
To litter train a kitten, set up a shallow, open-top box with unscented litter, confine your kitten to one room, and place them in the box after every meal and nap. This 10-step process takes most kittens 3 to 7 days. Consistent positive reinforcement — never punishment — is the key to lasting success.
Your kitten just peed on the bathroom rug — again — and you’re not sure what you’re doing wrong. You set up the litter box, you showed them where it is, and yet here you are, soaking up another accident with paper towels at midnight.
Without a clear, step-by-step system, those early accidents can become ingrained habits that are genuinely difficult to reverse. Kittens learn fast — and they learn the wrong things just as quickly as the right ones.
This guide shows you exactly how to litter train a kitten in 10 clear steps — including the right supplies for your kitten’s age, the precise timing that makes the habit click, and a full troubleshooting system for when things go sideways. Whether you have a three-week-old orphan or a newly adopted eight-week-old, you’ll find a protocol that fits.
Most kittens learn how to litter train within 3–7 days when given a shallow, unscented box, a small space to start, and consistent post-meal placement.
- Start at 3–4 weeks: Kittens begin eliminating independently around this age — the ideal training window.
- The 3-Stage Litter Readiness Window determines the right approach for your kitten’s exact age, from neonatal stimulation through graduated space expansion.
- Confinement accelerates training: Limiting roaming to one room cuts accident rates dramatically in the first week.
- Never punish accidents: Fear breaks the litter habit faster than anything else — clean silently and move on.
- Special cases exist: Stray, feral, and orphaned kittens need adapted protocols — covered in the Troubleshooting section.
What You’ll Need Before You Start
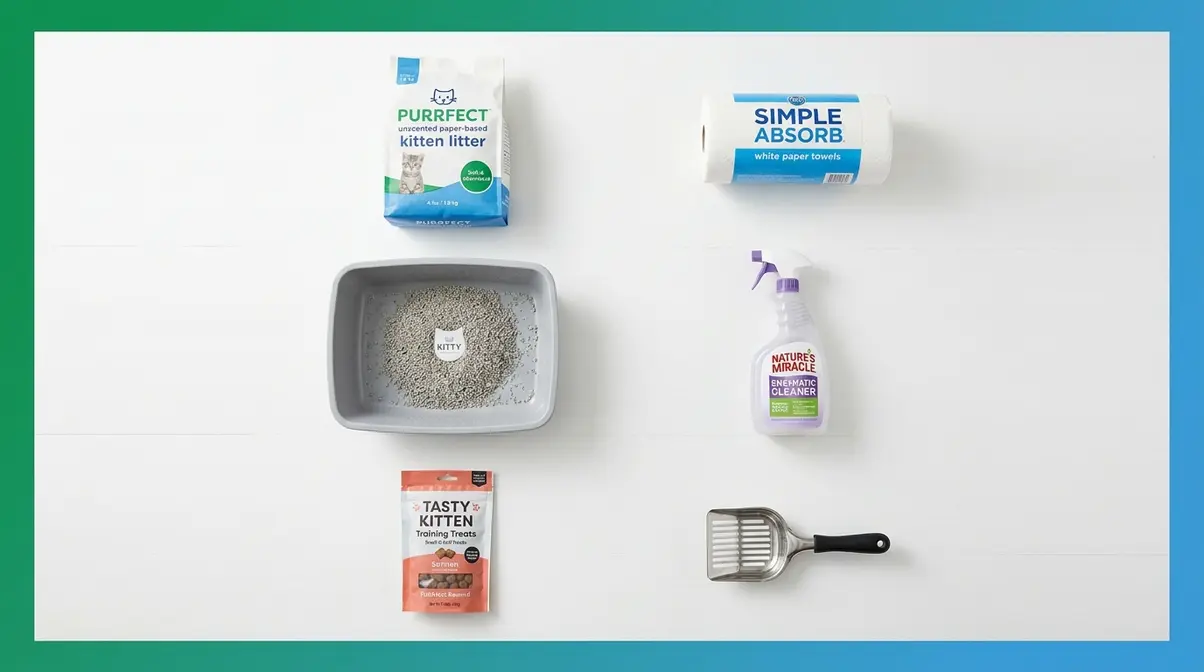
Getting litter training right starts before your kitten even enters the room. The wrong box or litter type is the number one reason training fails — and it’s entirely preventable. Here’s exactly what you need on Day 1.
Choosing the right supplies is the single most impactful thing you can do before training begins. Whether you’re wondering how to litter train a kitten for the first time or starting over after a rocky beginning, the equipment decisions you make now will determine how quickly the habit forms. For a deeper look at matching supplies to your kitten’s specific needs, see our guide to the best litter box and litter for kittens.
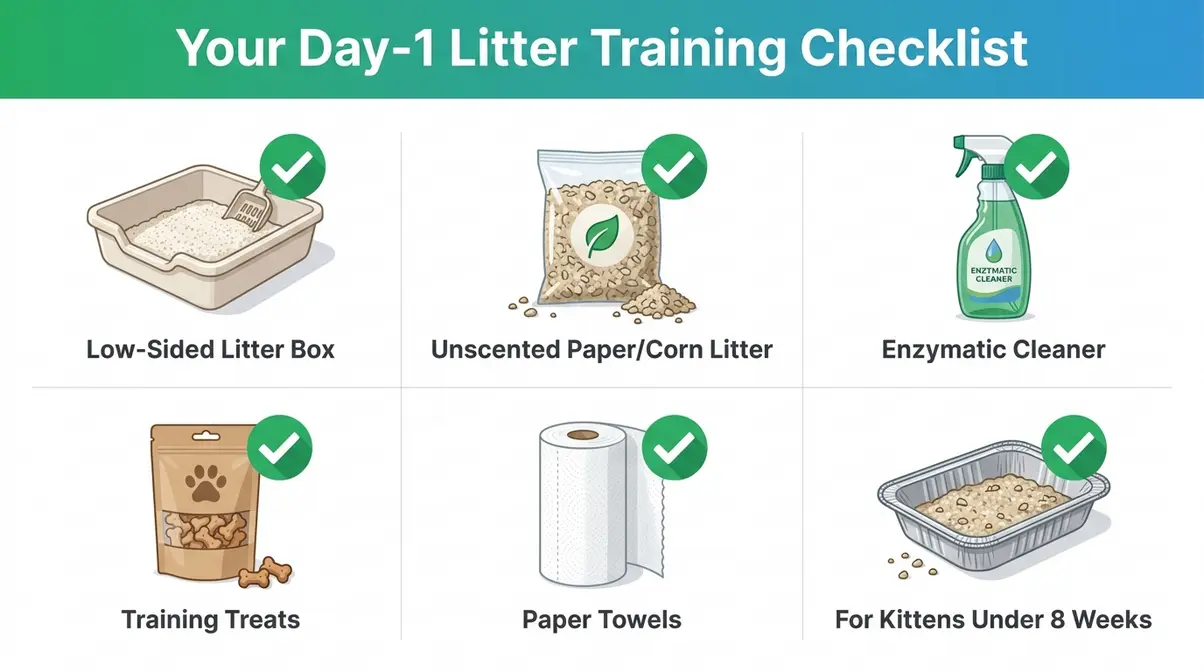
Your Day-1 Supply Checklist:
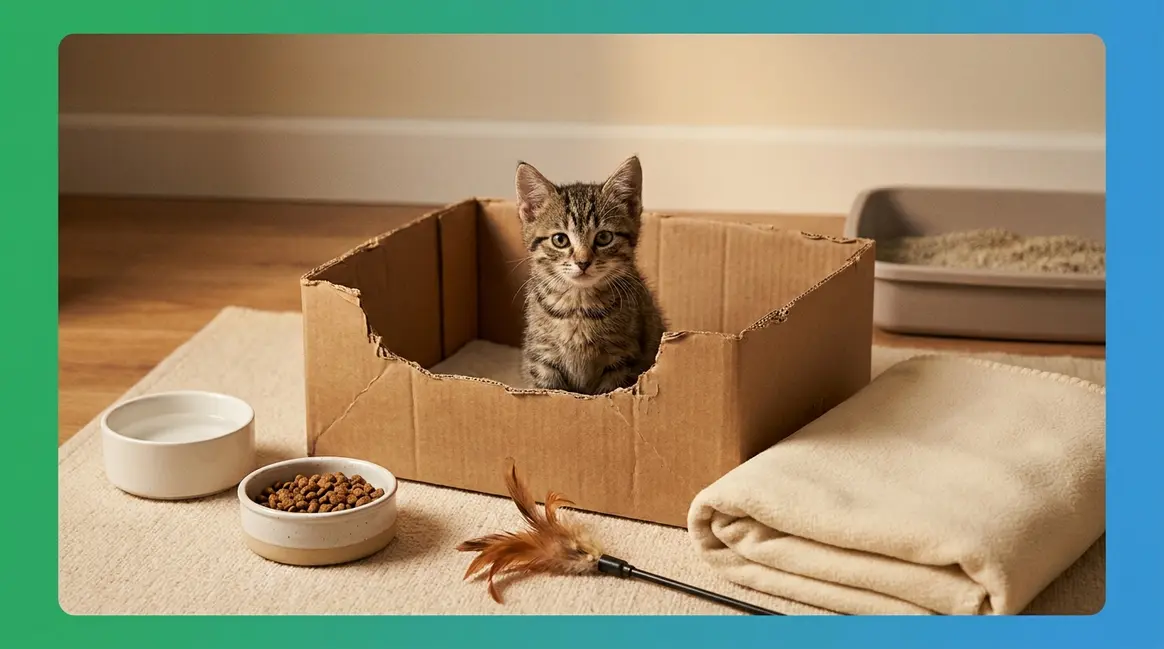
- ✅ Open-top, low-sided litter box (or a disposable aluminum roasting pan for very young kittens)
- ✅ Unscented paper-based, corn-based, or wheat-based litter (for kittens under 8 weeks)
- ✅ Unscented fine-grained clumping litter (for kittens 8 weeks and older)
- ✅ Enzymatic cleaner — a special solution that breaks down the odor molecules cats are drawn back to
- ✅ Small training treats for positive reinforcement
- ✅ Paper towels for quick accident cleanup
Choosing the Right Litter Box
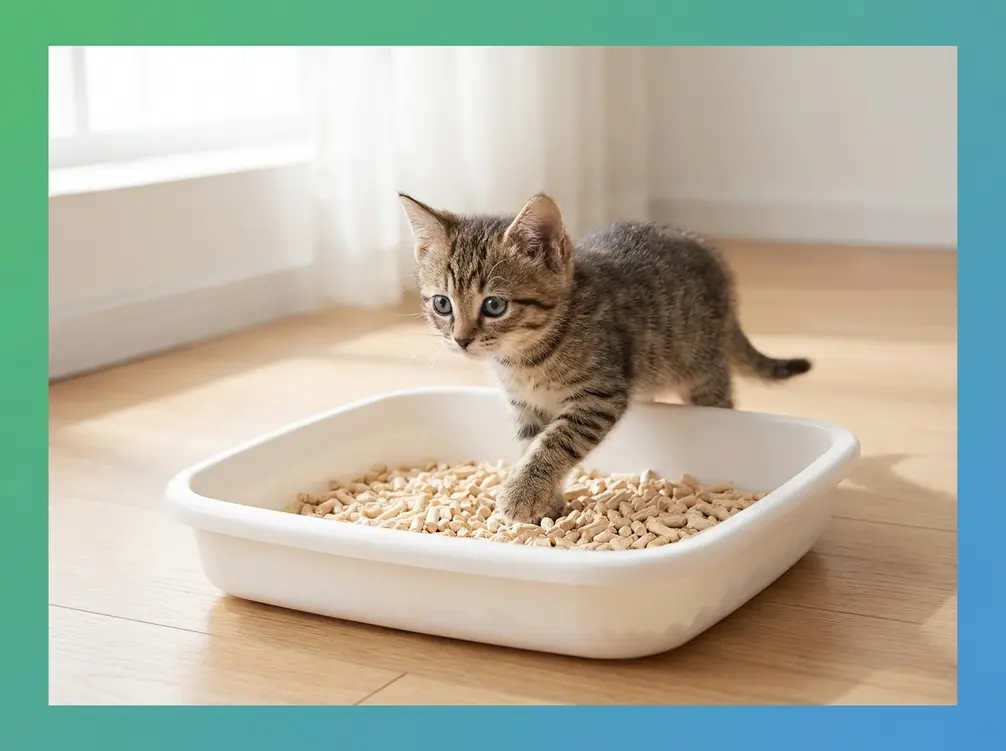
The best litter box for a kitten is an open-top, shallow litter box — one with low sides your kitten can step over easily without climbing or jumping. For kittens under 12 weeks, the sides should be no more than 2–3 inches high. A kitten that can’t get in won’t use it.
Size matters just as much as height. The American Association of Feline Practitioners recommends that a litter box be at least 1.5 times the length of the cat from nose to tail base. For most kittens, that means a box at least 12 inches long — though a small aluminum roasting pan works perfectly for neonatal kittens, since it’s shallow, inexpensive, and easy to swap out daily.
Avoid covered or hooded boxes during training. Kittens can feel trapped inside an enclosed space, and that anxiety causes avoidance. If you prefer a covered box long-term, introduce it only after the habit is firmly established — typically after 4–6 weeks of consistent use.
Once you have the right box, litter type is the next — and most safety-critical — decision you’ll make.
Picking the Safest Litter for Your Kitten’s Age
Litter choice isn’t one-size-fits-all — it’s age-specific, and getting it wrong can be dangerous. The key issue: kittens under 8 weeks explore everything with their mouths, and clumping clay litter can form a dangerous blockage if accidentally ingested. Veterinary consensus is clear on this point.
“I recommend using something like an unscented paper-based litter or even a corn or wheat-based litter until they’re eight weeks old and confidently exploring.” — Experienced kitten rescuer
| Age | Recommended Litter | Why |
|---|---|---|
| Under 8 weeks | Unscented paper-based, corn-based, or wheat-based litter | Safe if ingested; soft on tender paws; dust-free |
| 8 weeks and older | Unscented fine-grained clumping litter | Excellent odor control; easier to scoop; familiar texture |
Also avoid silica gel crystals and pine pellets for young kittens — both can irritate airways and sensitive paw pads. ASPCA guidelines on kitten development confirm that kittens typically begin independent elimination at 3–4 weeks, making non-toxic litter choices critical during this developmental window.
Scented litters — at any age — are worth avoiding entirely. A cat’s sense of smell is approximately 14 times more sensitive than a human’s, and strong artificial fragrances are a leading cause of box avoidance.
With your supplies ready, the right placement seals the deal — or breaks it.
Where to Place the Box (And What to Avoid)
Placement is simpler than most guides make it sound. Choose a quiet, low-traffic area your kitten can reach at any time. Avoid laundry rooms with active machines — sudden loud noises create lasting negative associations with the box, and a single frightening experience can cause a kitten to avoid the spot entirely.
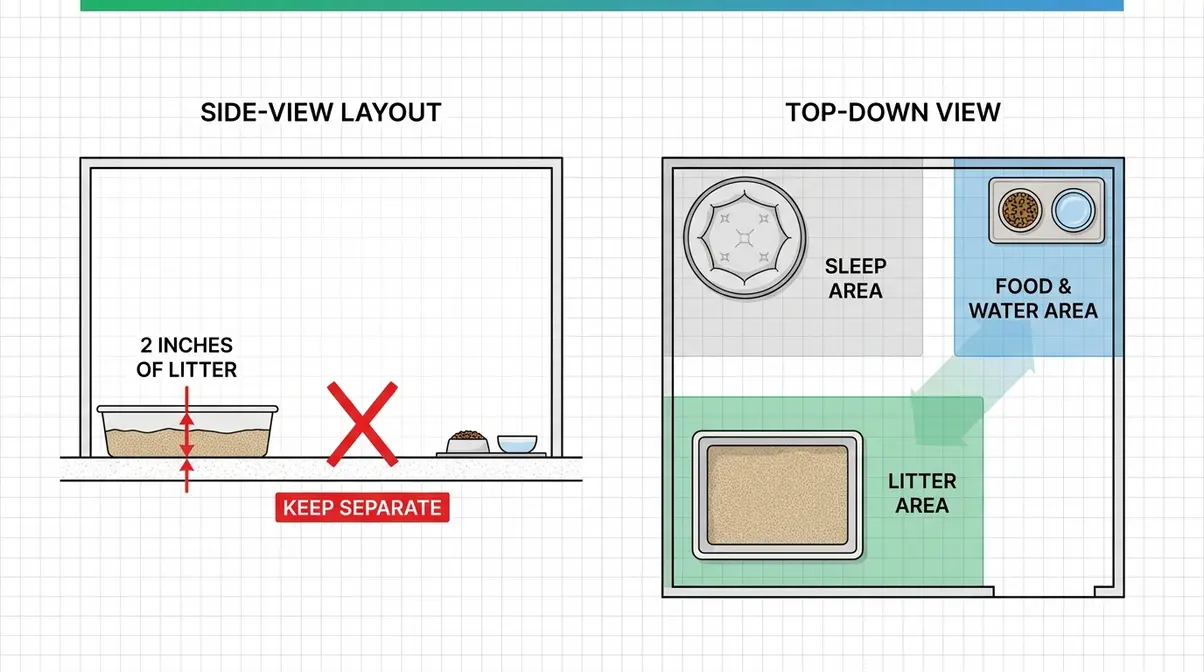
Never place the box near your kitten’s food or water bowls. Cats have a strong instinctive aversion to eliminating near their eating area — it’s hardwired. Keep the box on the opposite side of the room from the food station.
Follow the Ohio State University’s “one plus one” litter box rule: one litter box per cat, plus one additional, placed in separate locations. For a single kitten in one room, one box is sufficient at the start. As you expand their space in later steps, add a second box to match.
Now that your station is ready, it’s time to begin the actual training steps.
Step 1: Set Up Your Kitten’s Litter Station Before Bringing Them Home
Set up your kitten’s litter station completely before they arrive. A litter box that’s ready and in place from minute one means your kitten can find it immediately — before any accidents establish bad habits. Think of it as giving your kitten a mental map the moment they walk in.
Here’s what the station setup looks like in practice:
- Add 2 inches of litter — enough for your kitten to dig comfortably without burying themselves. Too shallow feels uncomfortable; too deep and small kittens won’t bother digging at all.
- Place the box in the room where your kitten will spend their first days. This is their starting zone, not the whole house.
- Stage enzymatic cleaner and paper towels nearby for quick accident cleanup. Speed matters — the faster you remove odor, the less likely your kitten is to return to that spot.
- Remove rugs, towels, or soft items near the box that could become accidental toileting spots. Soft textures mimic natural outdoor elimination surfaces.
UC Davis Veterinary Medicine hygiene standards recommend 2–3 inches of litter for optimal digging behavior and odor control — filling below that threshold is one of the most common setup errors new owners make.
Checkpoint: Your litter station is ready when the box is in place, filled with 2 inches of appropriate litter, and the room is clear of competing soft surfaces.
Step 2: Limit Your Kitten’s Roaming Space to One Room
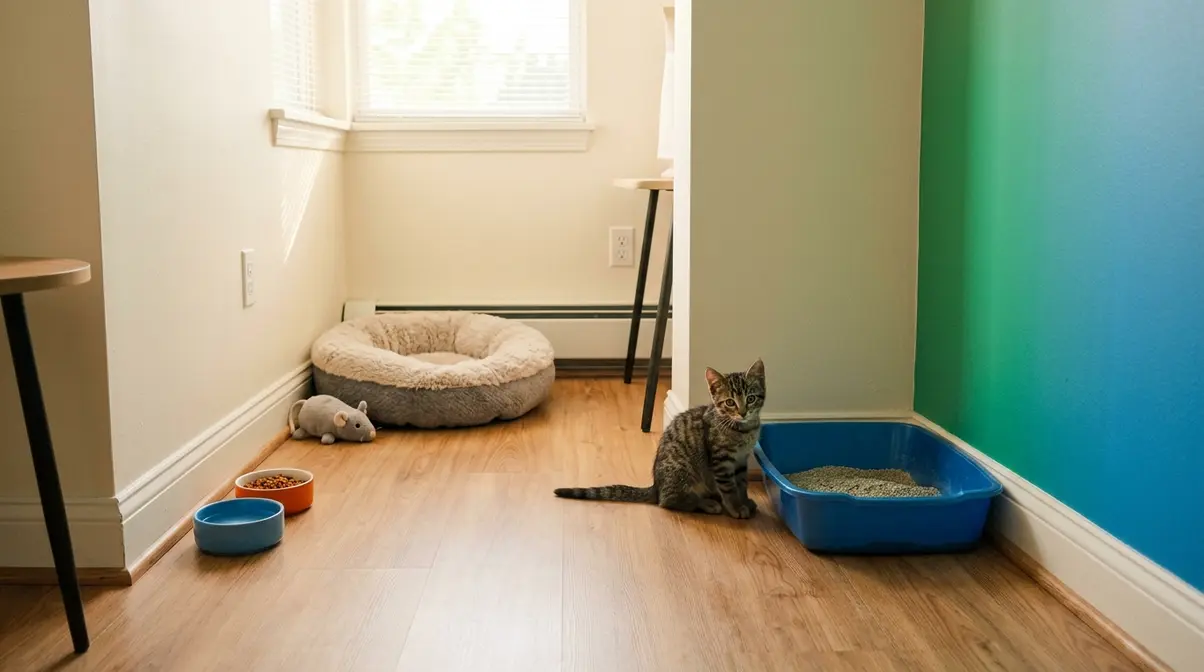
The fastest way to litter train a kitten is also the simplest: keep them in one room. When your kitten’s world is small, the litter box is always visible and accessible — and accidents become nearly impossible because there’s nowhere else logical to go.
This works because of a natural behavioral mechanism. Kittens instinctively eliminate away from their sleeping and eating area. In a small room, the litter box is the only obvious option that satisfies that instinct. Give a kitten free run of a three-bedroom home, and they’ll choose the nearest soft surface instead — every time.
Choose your confinement room — a single room, like a bathroom or spare bedroom, where your kitten starts their first days — based on these criteria:
- Small enough that the litter box is always visible from anywhere in the room
- Free of loud machines during training (laundry rooms can work, just keep the washer and dryer off)
- Equipped with: litter box, food and water bowls on the opposite side, a bed or blanket, and a few toys
- Cleared of: rugs, laundry piles, or any soft items that could become toilet alternatives — this is what experienced kitten handlers call “removing other temptations”
This setup may feel restrictive, but it’s actually kind. Kittens feel safer in small spaces — a large, unfamiliar home is overwhelming, not freeing. Expect to keep your kitten here for the first 1–2 weeks. For a complete step-by-step kitten litter training plan with a day-by-day breakdown, our 7-day guide walks through the expansion timeline in detail.
Checkpoint: Your kitten’s starting room has the litter box, food, water, and no competing soft surfaces within reach.
Step 3: Introduce Your Kitten to the Litter Box
To train a kitten to use a litter box, the first step is a calm, hands-on introduction — not waiting for them to find it on their own. The method depends on your kitten’s age, and getting this right can establish the habit in a single session. Forcing or frightening a kitten during this step creates lasting avoidance that’s far harder to correct later.
Kittens typically begin eliminating independently at 3 to 4 weeks of age — before this milestone, they require manual stimulation after every feeding (ASPCA guidelines on kitten development). Knowing which side of that milestone your kitten falls on determines which protocol you follow below.
How to Stimulate a Very Young Kitten (Under 4 Weeks)
Kittens under 4 weeks cannot eliminate on their own. In the wild, their mother would lick their genital and anal area after every feeding to trigger the elimination reflex. Without a mother present, you take on that role — a process called stimulation — the process of gently wiping a kitten’s bottom with a warm, damp cloth to trigger elimination, used for kittens too young to eliminate on their own.
Here’s the technique, step by step:
- Warm a cotton ball or soft cloth under warm (not hot) water. It should feel comfortable on your inner wrist.
- Gently wipe the kitten’s genital and anal area in a small, circular motion. Use light pressure — the goal is to mimic a mother’s tongue, not scrub.
- Continue for 30–60 seconds, or until the kitten eliminates. Most will respond within 30 seconds.
- At 3–4 weeks, immediately after stimulation, place the kitten in a very shallow litter tray — a small aluminum pan works well — so they begin associating the box with elimination before they can initiate it independently.
Use unscented paper-based litter or even plain paper towels at this stage. Nothing that could cause harm if accidentally ingested. The ASPCA guidelines on kitten development confirm that manual stimulation is required for kittens under 3–4 weeks after each feeding.
Once your kitten reaches 4 weeks and begins moving independently, the introduction process changes — and gets much simpler.
Introducing Older Kittens (4 Weeks and Up)
For self-mobile kittens, the introduction is straightforward. The goal is to create a positive first association, not to force a behavior.
- Gently pick up your kitten and place them in the litter box. Set them down softly — don’t drop them in.
- Use your finger to simulate digging in the litter — drag it through the surface in a slow, scratching motion. This mimics the digging behavior that triggers a kitten’s natural elimination instinct. Many kittens will immediately start pawing the litter themselves.
- Let them explore freely. If they step out right away, that’s completely fine. Do not force them to stay.
- Repeat after every meal and nap (covered in Step 4). Repetition, not force, builds the association.
One critical rule: never grab your kitten’s paws and force a digging motion. This creates fear of the box and of your hands — two things you absolutely don’t want your kitten to associate with each other.
The introduction works best when paired with consistent timing — which is exactly what Step 4 covers.
Step 4: Place Your Kitten in the Box After Every Meal and Nap
Routine is the fastest path to a fully litter-trained kitten. Kittens need to eliminate within minutes of eating and right after waking — and if you place them in the box during these windows every single time, the habit builds itself. You’re not training willpower; you’re training timing.
The biology behind this is simple. Kittens have a gastrocolic reflex — when the stomach fills, it sends a signal that triggers the colon to empty. In plain terms: when a kitten eats, their body tells them to eliminate within minutes. Use that window deliberately.
Your placement schedule:
- After every meal: Place your kitten in the box 5–15 minutes after eating. Set a timer if needed — this window closes fast.
- After every nap: Pick up your kitten the moment they wake and set them in the box before they wander.
- Before bedtime: One final placement each night reinforces the routine and reduces overnight accidents.
- Frequency for young kittens: Under 8 weeks, expect to do this every 1–2 hours during waking periods. Their bladder and bowel control are still developing.
“Place your kitten in the litter box 5–15 minutes after every meal and immediately after every nap — these are the two highest-probability elimination windows.” For a complete kitten litter training timeline and age considerations, our timeline guide breaks down what to expect day by day.
Checkpoint: After 3 days of consistent post-meal placements, most kittens will begin moving toward the box independently.
Step 5: Reward Every Success — Never Punish Accidents
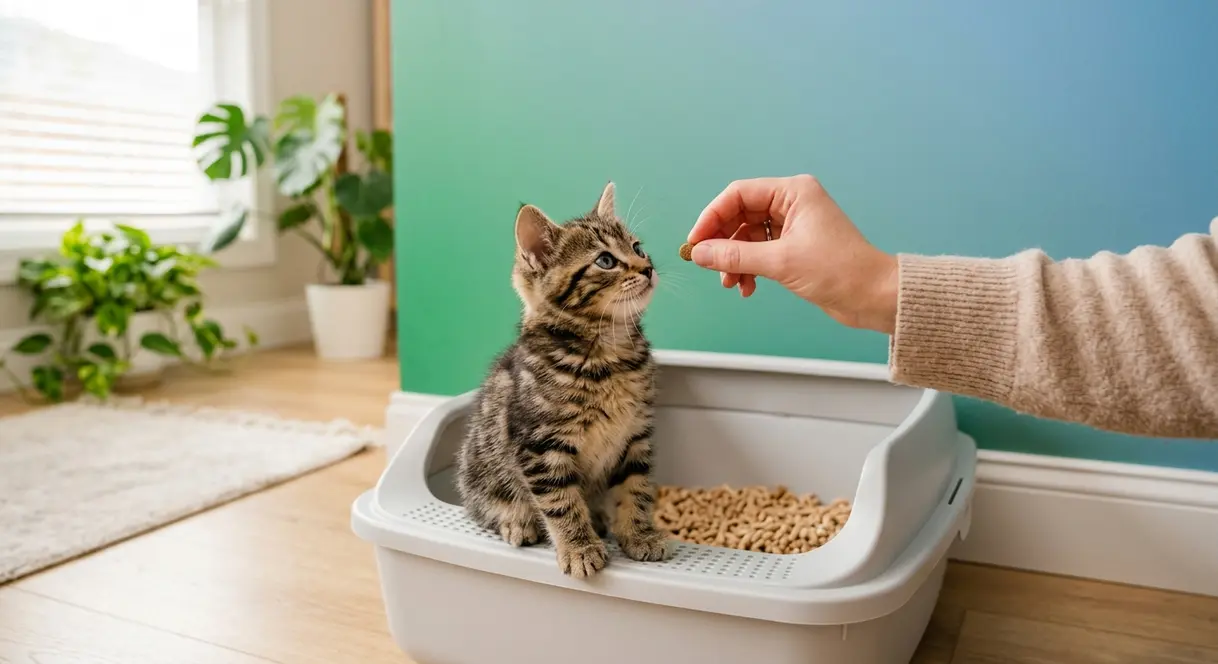
Positive reinforcement is not optional — it is the mechanism that makes litter training work. Every time your kitten uses the box correctly, reward them immediately. Every time they have an accident, clean it quietly and say nothing. Punishment teaches fear, not habits.
Positive reinforcement means rewarding a behavior you want repeated, immediately after it happens. The timing is everything. Cornell Feline Health Center’s litter box guidelines are explicit: punishment for house soiling is counterproductive. Cats do not connect punishment to past behavior — they connect it to your presence. The result is a cat that hides to eliminate, not one that uses the box.
What to do when they get it right:
- Immediate verbal praise: Say “good girl” or “good boy” in a warm, enthusiastic tone the moment elimination begins in the box — not after they’ve stepped out. The timing window is that tight.
- Small treat reward: Offer a tiny training treat within 3 seconds of box use. Rewards given more than 5 seconds after the behavior lose their associative power almost entirely.
What to do when they have an accident:
- Stay calm. Say nothing.
- Clean the spot immediately with enzymatic cleaner to eliminate all odor traces.
- Never scold, raise your voice, or carry the kitten back to the accident spot to “show them.” This creates anxiety around elimination — the opposite of what you want.
Checkpoint: You should see your kitten beginning to approach the box independently within 3–5 days of consistent post-meal placements and immediate rewards.
Step 6: Scoop the Box Daily — Clean It Weekly
A dirty litter box is the number one reason a kitten stops using it after initial training success. Kittens have a sense of smell approximately 14 times more sensitive than humans — what seems clean to you may be genuinely unbearable to them. Daily scooping is non-negotiable if you want the habit to hold.
“Scoop the litter box at least once daily and wash it completely with mild dish soap every 1–2 weeks” — this is the standard set by UC Davis Veterinary Medicine hygiene standards, and it’s the minimum, not the ideal.
Your maintenance schedule:
- Daily: Scoop waste at least once per day. Twice daily if you have multiple kittens.
- Weekly: Empty the box completely, wash with warm water and mild dish soap, dry fully, and refill with fresh litter.
- Avoid: Bleach, ammonia-based cleaners, or heavily scented sprays. Ammonia mimics the chemical signature of urine — using it to clean the box can actually draw your kitten back to eliminate in the wrong spot.
- Litter depth: After every cleaning, maintain exactly 2 inches of fresh litter.
One additional note: never use strongly scented cleaning sprays near the box even if you’re cleaning the surrounding floor. The residual scent lingers and can cause avoidance.
Checkpoint: If your kitten starts eliminating outside the box after initial success, check box cleanliness first — this is the most common cause of regression by a wide margin.
Step 7: Gradually Expand Your Kitten’s Roaming Space
Once your kitten has used the box consistently for 7 days in a row, they’ve earned more space. Expanding too fast is the number one cause of training regression — but expanding at the right pace builds lasting independence that carries through adulthood. The goal is steady progress, not a sudden leap.
Follow the effective kitten litter training methods outlined below for a phased approach that minimizes setbacks.
Your phased expansion plan:
- Green light signal: 7 consecutive days of box use with zero accidents = ready to expand. Not 5 days. Not “mostly” — 7 clean days.
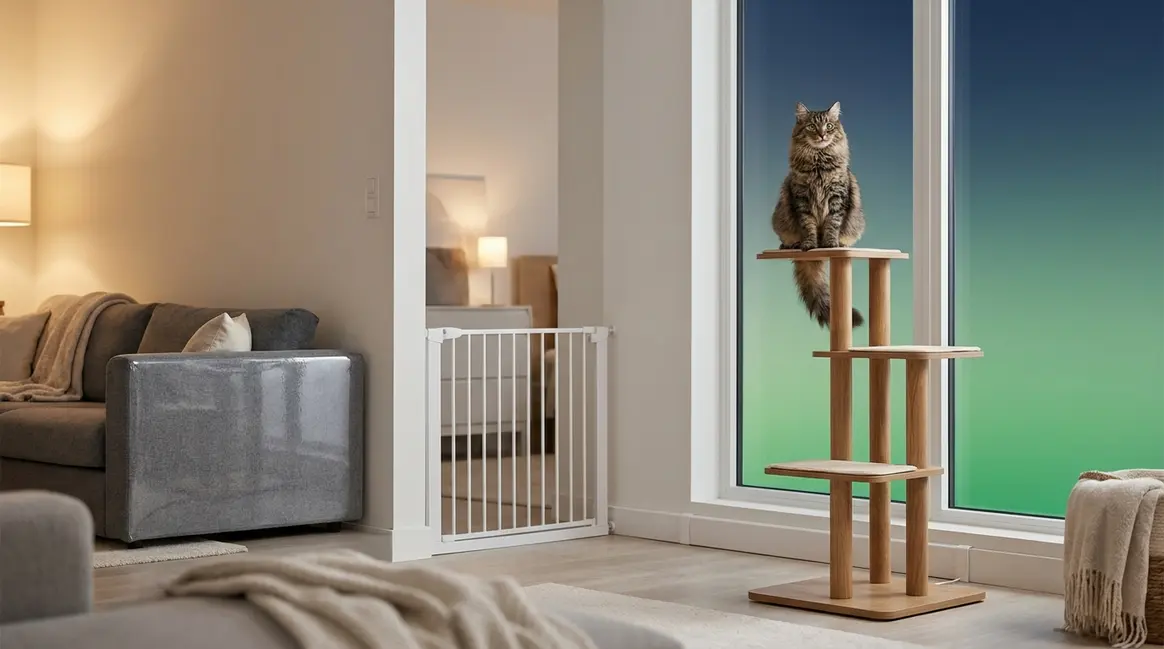
- Phase 1: Open the door to one adjacent room. Keep the litter box in its original location. Do not move it.
- Phase 2: After another 5–7 days of success in the expanded space, introduce a second room. At this stage, consider adding a second box if the home is large — following the Ohio State “one plus one” rule.
- The distance rule: The litter box should never be more than one room away from where your kitten spends most of their time. If they have to travel far to reach it, they won’t.
Checkpoint: If your kitten has an accident during expansion, return to the previous room size for another week. This is a normal part of the process — not a failure, and not a reason to start over from Step 1.
When to Start: Age, Timing, and the 3-Stage Litter Readiness Window
How long does it take to litter train a kitten? For most kittens, 3 to 7 days of consistent training is enough to establish reliable habits. But the right approach — and realistic timeline — depends on your kitten’s exact age. The 3-Stage Litter Readiness Window — a framework that maps your kitten’s developmental stage to the right training approach — makes this clear at a glance.
Most kittens litter train reliably within 3–7 days when confinement and post-meal placement are used consistently — but the right approach depends entirely on which stage of the Readiness Window they’re in.
The Kitten Development Timeline (3 Weeks to 6 Months)
Understanding what age to start litter training a kitten requires understanding what’s actually happening in their body and brain at each stage. The ASPCA guidelines on kitten development confirm that independent elimination begins at 3–4 weeks — before this point, no amount of box placement will work without stimulation.
| Age | Stage | What’s Happening | Training Approach |
|---|---|---|---|
| 0–3 weeks | Neonatal | Cannot eliminate independently; requires maternal stimulation | Manual stimulation after every feeding; no box yet |
| 3–4 weeks | Stage 1 — Early Readiness | Beginning to eliminate independently; wobbly and exploring | Shallow box introduction immediately after stimulation sessions |
| 4–8 weeks | Stage 2 — Active Training | Self-initiated elimination; strong instinct forming | Confinement + post-meal placement + simulate digging |
| 8 weeks–6 months | Stage 3 — Full Training | Capable of full habit formation; learning household routine | Graduated space expansion; one plus one box rule |
| 6+ months (adopted adult) | Post-Window | Habits may already be formed (good or bad) | Patient retraining — 2–4 weeks instead of days |
A kitten adopted at 8 weeks is already in Stage 3 — skip stimulation entirely and begin directly at Step 3 of this guide.
Is it ever too late to litter train a cat? No. Adult rescues and older cats can absolutely learn, but expect the process to take 2–4 weeks rather than days. The key is the same: confinement, routine, and positive reinforcement. Patience replaces speed.
Understanding your kitten’s developmental stage is half the picture. The other half is understanding how they adapt to their new home — which the 3-3-3 rule explains.
Understanding the 3-3-3 Behavioral Adaptation Rule
The 3-3-3 rule — an adaptation guideline describing how kittens adjust to a new home over 3 days, 3 weeks, and 3 months — originated in dog rescue but applies meaningfully to kitten behavioral adjustment. It sets realistic expectations so new owners don’t panic when the first few days are rough.
| Phase | Timeframe | What Your Kitten Is Experiencing | What to Expect |
|---|---|---|---|
| Decompression | First 3 days | Overwhelmed, hiding, anxious | Accidents are normal; do not increase pressure |
| Routine Learning | First 3 weeks | Learning the household schedule | Training clicks most strongly during this window |
| Full Adjustment | First 3 months | Feeling fully at home | Reliable, consistent litter habits established |
Applied directly to litter training: during the first 3 days, accidents are a decompression response — not a training failure. Your kitten is processing a completely new environment, new smells, new sounds, and new people. Maintaining the routine during this phase is the most important thing you can do.
Training “clicks” most powerfully during the 3-week phase, when your kitten begins to recognize the household routine as predictable and safe. This is when consistent post-meal placement has the greatest impact. By 3 months, the habit should be automatic.
If your kitten has accidents on Days 1–3, hold the routine steady and wait. The how long does kitten litter training take question almost always answers itself by the end of Week 2.
Even with the best setup and timing, some kittens hit obstacles. The next section gives you a complete troubleshooting system for every scenario.
Troubleshooting: Why Isn’t My Kitten Using the Litter Box?
Accidents after initial training success are a signal, not a failure. Something in the environment, routine, or health picture has changed — and this section helps you find it fast. Work through the flowchart first, then use the specific protocols below for medical red flags and special cases.
The Accident Troubleshooting Flowchart
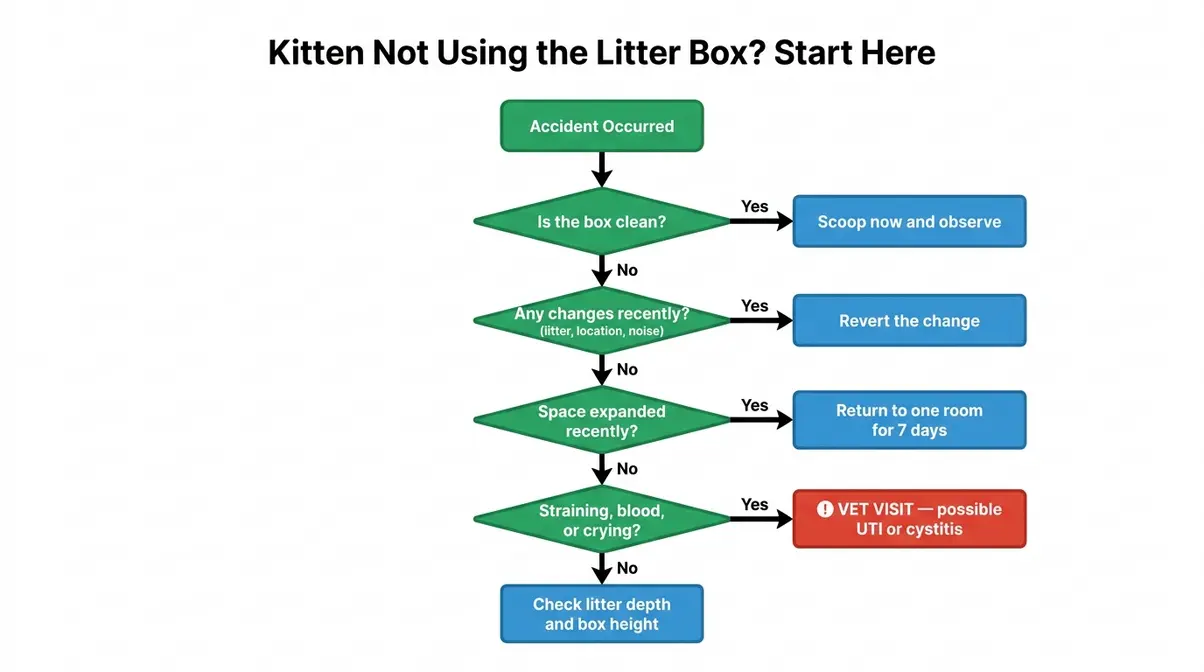
Quick Diagnostic Checklist:
- Is the box clean? Scoop it now and observe. A dirty box is the most common cause of avoidance.
- Has anything changed? New litter brand, new location, new household member, new noise source — cats are sensitive to change.
- Is the box accessible? Kittens grow fast. A box that was easy to climb into at 4 weeks may have shifted to a harder-to-reach spot.
- Is the space too large? If you expanded their roaming area recently, return to the smaller space temporarily.
- Is your kitten straining, crying, or producing blood? This requires a vet visit — see Medical Red Flags below.
Medical Red Flags vs. Behavioral Issues
Not every litter box problem is a training problem. Across veterinary records and cat care communities, a consistent pattern emerges: owners who mistake medical symptoms for behavioral issues delay treatment that can become serious quickly.
See a veterinarian promptly if your kitten shows any of these signs:
- Straining to urinate or defecate with little or no output
- Crying or vocalizing while in the litter box
- Blood in urine or stool
- Urinating in very small, frequent amounts
- Sudden onset of accidents in a previously trained kitten
- Lethargy, loss of appetite, or excessive grooming of the genital area
These symptoms may indicate a UTI (urinary tract infection) — a bacterial infection of the urinary tract that causes pain and urgency — or stress cystitis — inflammation of the bladder triggered by environmental stress, which is common in newly adopted kittens. Both conditions are treatable, but neither resolves on its own.
The behavioral causes of box avoidance are different in character. They develop gradually, follow a pattern (always near a window, always on soft surfaces), and do not include physical distress signals. If your kitten seems comfortable but is consistently choosing the wrong spot, it’s behavioral — work through the diagnostic checklist above.
Special Cases: Stray, Feral, and Orphaned Kittens
Standard litter training protocols assume a kitten that has had some human socialization. Stray, feral, and orphaned kittens require adapted approaches — and understanding the difference between them matters.
Orphaned kittens (without a mother):
These kittens miss the critical learning period where a mother cat demonstrates elimination behavior. Follow the stimulation protocol in Step 3 precisely. Use unscented paper-based litter exclusively until 8 weeks. Expect the training window to take slightly longer — up to 10–14 days instead of 3–7.
Stray kittens (previously outdoor but human-socialized):
Stray kittens may have learned to eliminate outdoors and resist the box initially. Place a small amount of outdoor soil or sand in the litter box alongside the regular litter for the first week — this bridges the gap between familiar outdoor texture and the new litter. Transition to litter-only once the habit is established.
Feral kittens — kittens born without human contact, often requiring a longer desensitization process — present the greatest challenge. The litter box itself may be frightening because it’s an unfamiliar enclosed-ish space. Keep the box as open and shallow as possible. Place it in a quiet corner. Avoid approaching the kitten while they’re near the box. Use the confinement room protocol strictly — feral kittens need the smallest possible starting space to build confidence. Expect 2–4 weeks for reliable habits to form.
For all three special cases: enzymatic cleaner is your most important tool. Any spot where elimination has occurred will retain odor that draws the kitten back — remove it completely within minutes of discovery.
Common Litter Training Mistakes to Avoid
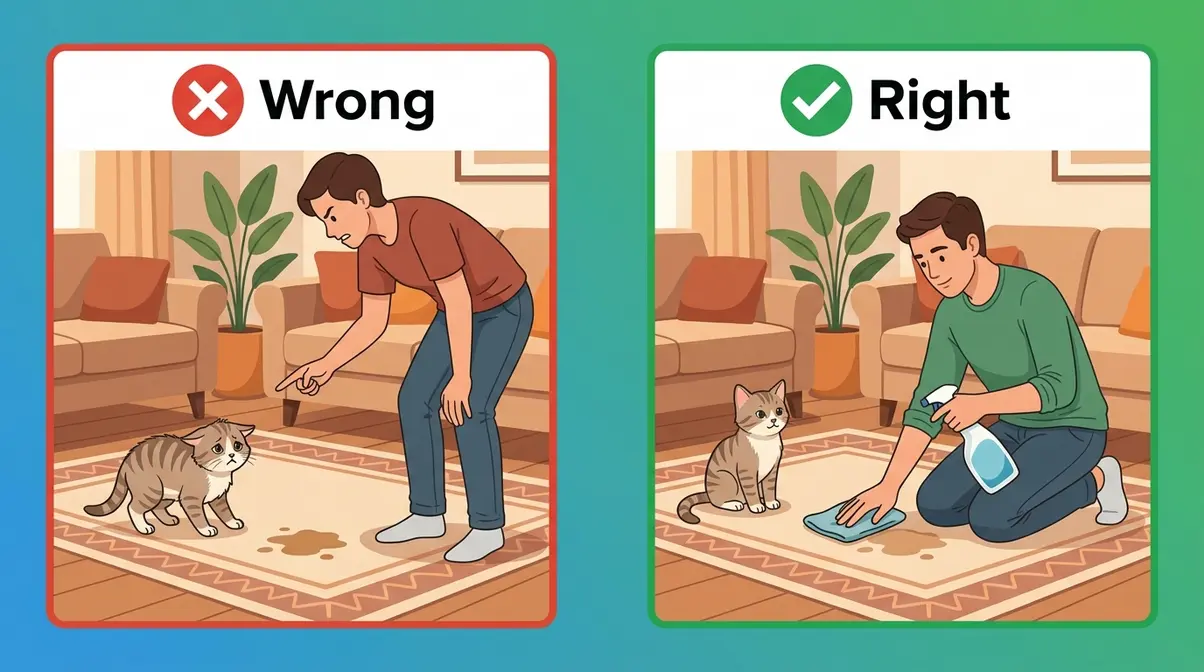
Even with the right supplies and a solid routine, a few common errors can stall progress or cause regression. Our team evaluated the most frequently reported issues across cat care communities — these are the patterns that appear most consistently.
1. Using clumping litter for kittens under 8 weeks.
Veterinary consensus is clear: clumping clay litter is dangerous for young kittens who may ingest it during grooming. Stick to paper-based, corn-based, or wheat-based options until the 8-week mark.
2. Punishing accidents.
Rubbing a kitten’s nose in an accident, raising your voice, or any physical correction creates fear — not understanding. As the Cornell Feline Health Center notes, cats cannot connect punishment to a past behavior. They connect it to you.
3. Moving the litter box.
Once placed, the box should stay in the same location throughout training. Moving it — even a few feet — can confuse a kitten who has just started forming the spatial habit.
4. Expanding space too quickly.
Seven consecutive clean days is the green light. Not five. Not “mostly clean.” Premature expansion is the leading cause of regression in kittens who were previously doing well.
5. Using scented litter or scented cleaners near the box.
A cat’s nose registers scents at concentrations humans can’t detect. Artificial fragrances in litter and cleaning products are among the most common causes of box avoidance that owners never identify.
6. Skipping the enzymatic cleaner.
Regular household cleaners remove visible stains but leave behind the odor molecules that draw cats back to the same spot. Enzymatic cleaner — the special solution that breaks down those odor molecules — is the only product that eliminates the scent signal completely.
7. Giving up too early.
Most kittens need 3–7 days. Some, particularly feral or orphaned kittens, need 2–4 weeks. A kitten that isn’t trained by Day 5 is not a lost cause — they’re simply on a longer timeline.
Frequently Asked Questions
What is the fastest way to litter train a kitten?
The fastest method is confinement combined with post-meal placement. Keep your kitten in a single small room with the litter box always visible. Place them in the box 5–15 minutes after every meal and immediately after every nap. Most kittens establish reliable habits within 3–7 days using this approach (ASPCA, 2024). Avoid scented litter, keep the box spotlessly clean, and reward every successful use within 3 seconds with verbal praise or a small treat. Skipping confinement is the single biggest reason training takes weeks instead of days.
What is the 3-3-3 rule for kittens?
The 3-3-3 rule describes how a kitten adjusts to a new home in three distinct phases. In the first 3 days, your kitten is in decompression — overwhelmed, potentially hiding, and prone to accidents. Over the first 3 weeks, they learn the household routine and this is when litter training clicks most reliably. By 3 months, they feel fully at home and habits are automatic. Originally developed in dog rescue, the rule applies meaningfully to kitten behavioral adjustment and helps owners avoid panicking during the first few difficult days. Accidents in Days 1–3 are a decompression response, not a training failure.
What are the most common litter training mistakes?
The most common mistakes are using clumping litter for kittens under 8 weeks, punishing accidents, and expanding space too quickly. Clumping clay litter is dangerous if ingested by young kittens — use paper-based or corn-based litter until 8 weeks. Punishment creates fear of you and the box, not an understanding of what went wrong. Expanding roaming space before 7 consecutive clean days causes regression in kittens who were previously trained successfully. Two other frequent errors: moving the litter box after training begins, and using scented litter or ammonia-based cleaners that drive box avoidance.
How do I stop my kitten from peeing and pooping outside the box?
Start by ruling out a medical cause — straining, crying, blood, or sudden onset in a trained kitten all require a vet visit. If the issue is behavioral, work through this checklist: Is the box clean? (Scoop it immediately.) Has anything changed — litter brand, location, household noise? Is the space too large? Return to one-room confinement if you’ve recently expanded. Clean every accident spot with enzymatic cleaner to remove odor signals. If your kitten is consistently choosing soft surfaces like rugs or laundry, remove those items temporarily. For stray kittens, try mixing a small amount of outdoor soil into the litter to ease the transition.
Conclusion
For new kitten owners, litter training is one of the most anxiety-inducing parts of those first weeks — but it’s also one of the most manageable when approached systematically. Most kittens train reliably within 3–7 days using the 10-step framework in this guide: the right supplies for their age, a confined starting space, consistent post-meal placement, and immediate positive reinforcement. The combination of these elements removes the guesswork and gives your kitten every structural advantage for success.
The 3-Stage Litter Readiness Window is the underlying logic that makes this framework work. Knowing which stage your kitten is in — neonatal stimulation, active confinement training, or graduated expansion — means you’re never applying the wrong technique at the wrong time. That alignment is what separates a 3-day success from a 3-week struggle.
Start today with Step 1: get the box set up before your kitten arrives, or set it up right now if they’re already home. If you’re dealing with a stray, feral, or orphaned kitten, go directly to the Special Cases section and follow the adapted protocol. Give it 7 consistent days before adjusting anything — madcatman.com’s experience across hundreds of kitten training scenarios consistently shows that patience with the routine, not changes to it, is what breaks through the toughest cases.

Dave King
Cat owner and writer at Mad Cat Man.