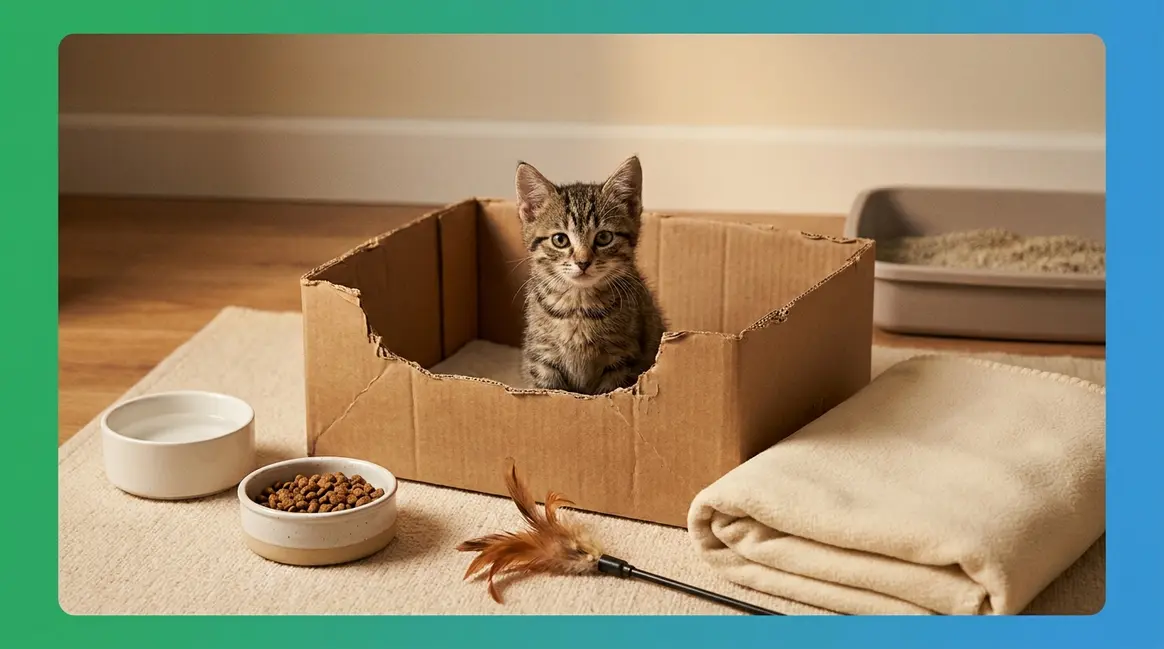
Cat-Proof Your Apartment Without Drilling: 7 Safe Steps
Get proven strategies for How Do I Cat Proof My Apartment Without Drilling? 15 Renter-Friendly, Vet-Approved Fixes for a Safe, Stimulating Home so you can…

You just noticed your balcony railing has a gap wide enough for your cat to squeeze through — and you’re four storeys up. When figuring out how to cat proof an apartment without drilling, you might feel overwhelmed. You can’t drill a single screw into the wall without risking your deposit, but you also can’t leave things the way they are.
“Use freestanding cat trees, no-drill gates, washable covers, cord covers, mats …”
— Renter from the madcatman.com community
Every day without a plan is a day your cat could chew through a live wire or scratch a groove into the skirting board that costs you £200 when you move out. The dual risk — a vet bill AND a deposit deduction — is real. By the end of this guide, you’ll have a complete, deposit-safe cat-proofing setup using only pressure-fit, adhesive, and freestanding solutions.
To cat-proof an apartment without drilling, work through these 7 renter-safe steps: audit your lease, secure balconies with tension-pole netting, protect furniture with anti-scratch film and scratching posts, block rooms with pressure-mounted gates, cover electrical cords, create vertical space with a freestanding cat tree, and do a final safety walk-through. Every method is deposit-safe and leaves no permanent damage.
Learning how to cat proof an apartment without drilling is entirely achievable with The No-Drill Safety Stack — a layered method using pressure-fit, adhesive, and freestanding solutions that protects your cat and your security deposit simultaneously.
- Audit first: Review your lease and map hazard zones before buying anything.
- Layer your defences: Combine physical barriers (tension poles, gates) with deterrents (anti-scratch film, cord covers) and enrichment (cat trees, perches).
- Every fix is reversible: Nothing in this guide requires a drill, wall anchor, or permanent adhesive.
What You’ll Need Before You Start
Before you buy a single product, two things will save you time and money: the right mindset about what “renter-friendly” actually means, and a short preparation checklist.
How do you make an apartment cat-proof?
Making an apartment cat-proof means systematically addressing five hazard categories: falls (balcony and window barriers), access (pressure-mounted gates and cabinet locks), cord hazards (cable sleeves and raceways), toxic items (plants and cleaning products secured), and boredom (vertical space and enrichment). For renters, every solution should be deposit-safe — meaning pressure-fit, adhesive-removable, or freestanding. Working through the 7-step process below covers all five categories without a single drill hole.
Mindset: Deposit-Safe vs. Drill-Free
Deposit-safe and drill-free are related but not identical. Drill-free means no screws, no rawl plugs, no holes. Deposit-safe means no permanent damage of any kind — which also rules out strong permanent adhesives, heavy furniture dragged across hardwood, and anything that stains walls.
The good news: modern tension-pole systems (adjustable floor-to-ceiling poles that apply outward pressure without screws), suction-cup mounts (vacuum-seal attachments that grip smooth surfaces), and removable adhesive strips have made deposit-safe cat-proofing genuinely effective. Our team evaluated setups across a range of apartment types — studio flats, open-plan rentals, and high-rise units with balconies — and found that a layered approach outperforms any single product every time. That layered approach is what we call The No-Drill Safety Stack.
Your 7-Step Preparation Checklist
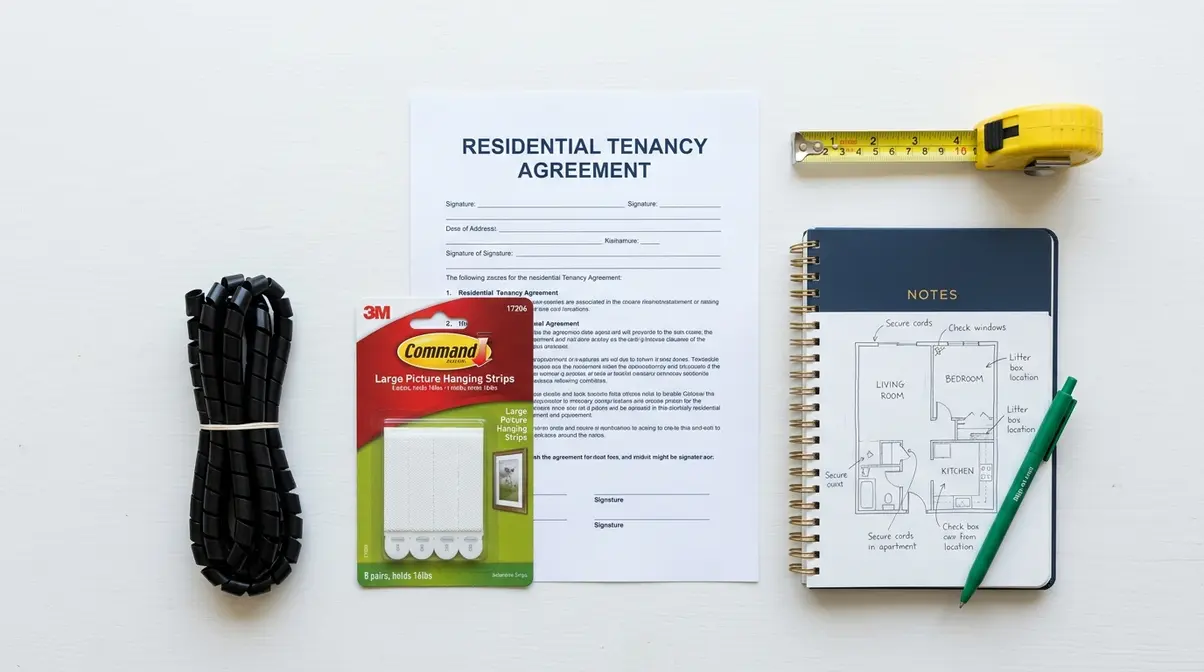
Gather these before starting:
- A copy of your lease (check the pet and alterations clauses)
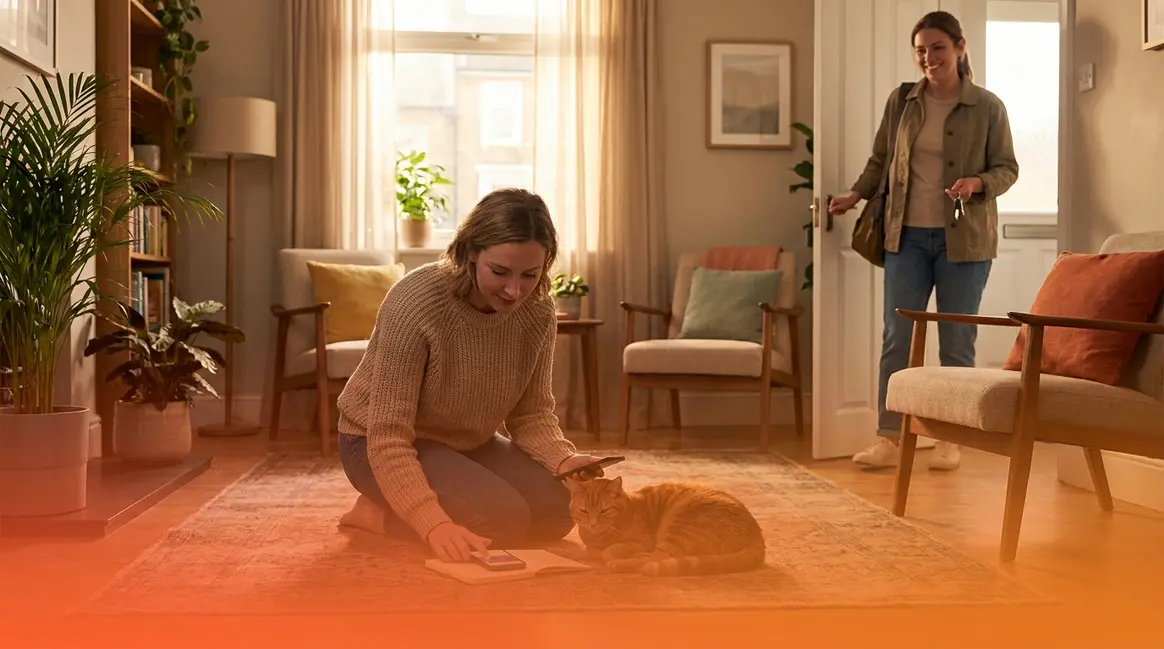
- A notepad or phone for mapping hazard zones room by room
- A tape measure (critical for tension poles and gate sizing)
- Removable adhesive strips (Command strips or equivalent)
- A roll of cable management sleeves or spiral wrap
- Budget estimate: £80–£200 covers most apartments for all 7 steps
Step 1: Audit Apartment & Review Lease
When learning how to cat proof an apartment without drilling, rushing to buy products before you understand your specific apartment’s risks is the most common mistake cat owners make. This step costs nothing and prevents expensive re-purchases later. For a broader look at rental restrictions, check our renter-friendly cat-proofing guide.
Check Your Lease Before Buying
Open your lease and look for three clauses: the pet clause (confirms you’re allowed a cat), the alterations clause (defines what counts as “damage”), and the restoration clause (specifies what you must repair at move-out).
Most standard tenancy agreements in the UK and US define damage as anything requiring professional repair — meaning removable adhesive strips and freestanding furniture are universally safe. However, some leases explicitly prohibit adhesive of any kind on painted surfaces. If yours does, you’ll rely entirely on tension poles, suction cups, and freestanding solutions throughout this guide.
If in doubt, email your landlord. A brief message saying “I plan to use removable Command strips and freestanding furniture to keep my cat safe — is that acceptable?” creates a paper trail that protects you at move-out.
Mapping Apartment Risk Zones
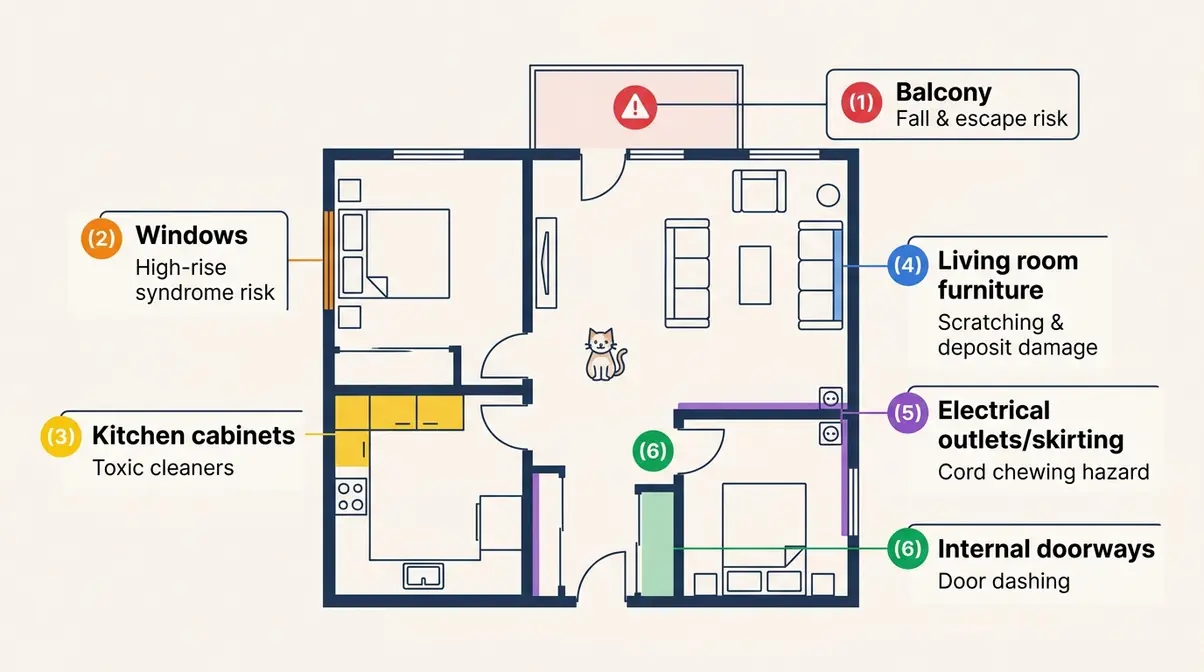
Walk through every room with your notepad and mark each of these six risk zones. This is the foundation of The No-Drill Safety Stack — you stack solutions only where genuine hazards exist, so you don’t over-spend or over-engineer.
| Risk Zone | Hazard | No-Drill Solution |
|---|---|---|
| Balcony / terrace | Falling, escaping | Tension-pole cat netting |
| Windows | Falling through open window | Suction-cup window guard or perch |
| Kitchen / bathroom cabinets | Toxic cleaning products | Adhesive magnetic cabinet locks |
| Living room furniture | Scratching, deposit damage | Anti-scratch film + scratching post |
| Electrical outlets and cords | Chewing, electrocution | Cord protectors, cable sleeves |
| Internal doorways | Room access, door dashing | Pressure-mounted safety gates |
Once your map is complete, you’re ready to work through each zone systematically.
Step 2: Secure Balconies & Windows
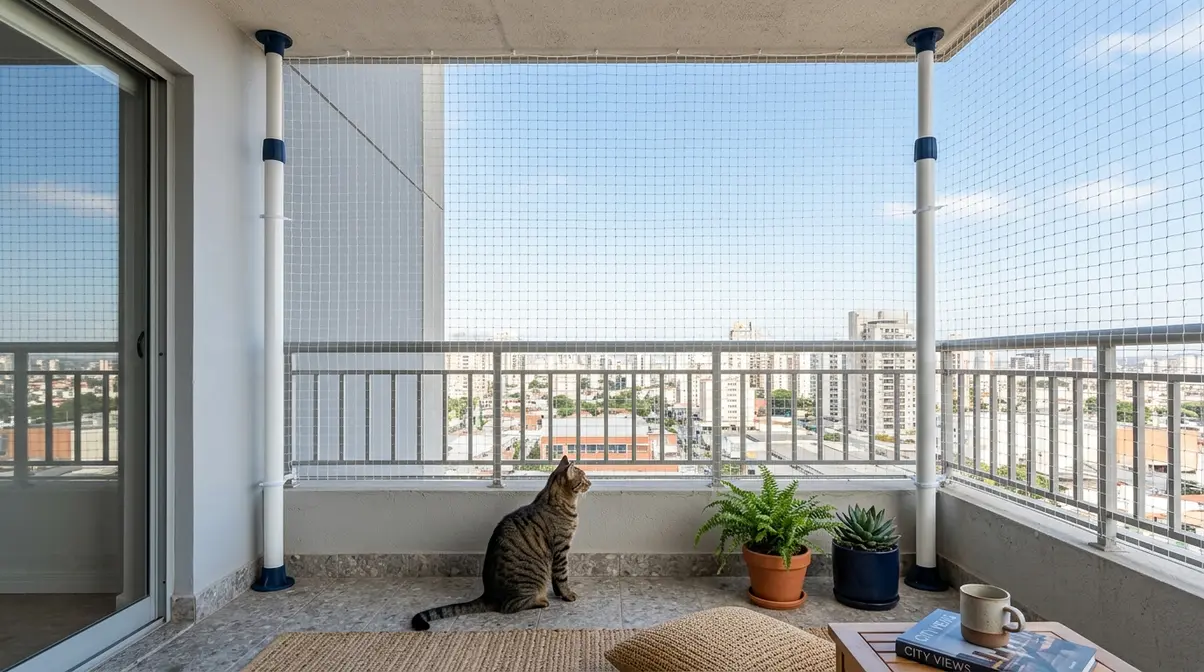
Balcony and window falls are among the most serious hazards for indoor cats. The ASPCA notes that “high-rise syndrome” — injuries from falls — is a documented veterinary emergency, particularly in warmer months when windows are left open. Fortunately, tension-pole systems and suction-cup guards make this the most solvable step in the entire guide.
Install Tension-Pole Balcony Netting
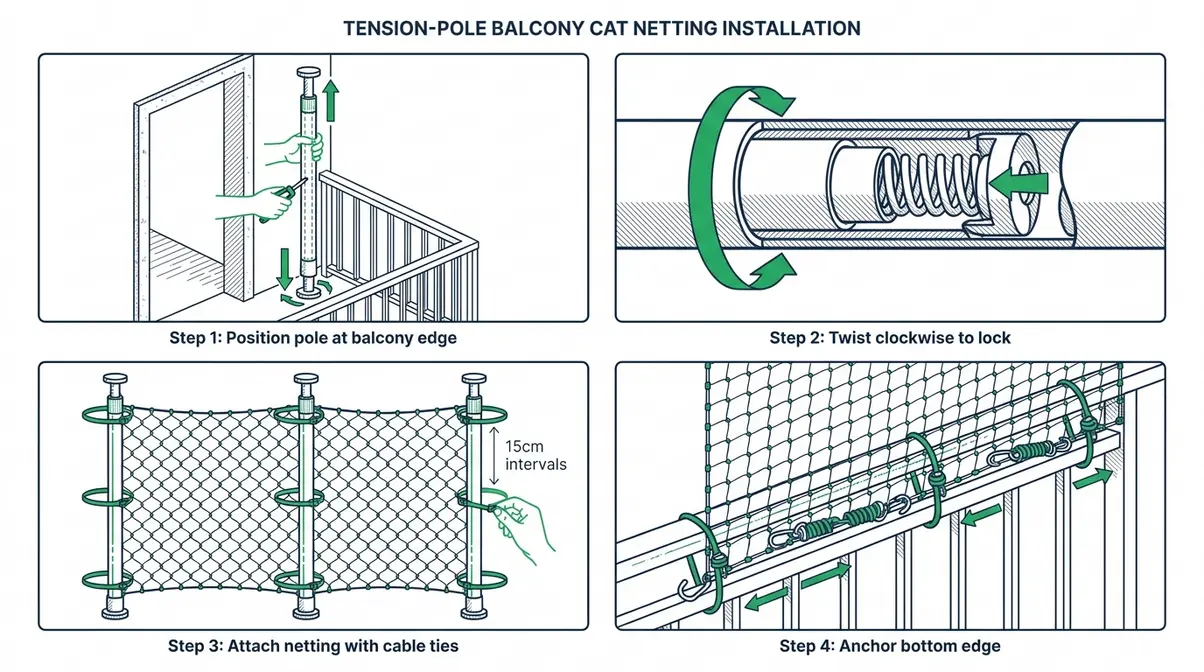
A cat net (a mesh barrier attached to adjustable tension poles) creates a full balcony enclosure without a single drill hole. Here is how to install one:
What you’ll need: 2–4 tension poles (sized to your ceiling-to-floor height), cat-safe netting (mesh aperture no larger than 5cm/2 inches), cable ties or bungee clips, a tape measure. Allow approximately 30–45 minutes.
- Measure your balcony opening. Record the width and the floor-to-ceiling height. Add 10cm to the height measurement to account for pole compression.
- Extend the tension poles to approximately 5cm shorter than your ceiling height. Place the first pole at one edge of the balcony opening.
- Twist the pole clockwise to extend the internal spring mechanism until the pole is firmly wedged between floor and ceiling. It should not wobble when pushed sideways.
- Repeat for remaining poles, spacing them no more than 90cm apart across the opening.
- Attach the netting to the poles using cable ties at 15cm intervals from top to bottom. Start at the top and work downward to keep tension even.
- Check the bottom edge. The net should sit flush to the floor or balcony railing. Use bungee clips to anchor any loose lower sections.
- Test by applying firm lateral pressure to the centre of the net. It should flex slightly but not detach. Cat owners consistently report that a properly tensioned system holds firm even against persistent climbers.
For detailed guidance on net and clamp selection, this installation walkthrough from Huck-Net covers rope thickness and clamp ratings for different balcony configurations.
Setting Up Window Perches Safely
Suction-cup window perches (platforms that attach to glass via vacuum-seal discs) let your cat enjoy a window view safely, without screws or wall anchors. They also discourage cats from sitting directly on an open windowsill.
- Installation checklist:
- Clean the glass thoroughly with rubbing alcohol before attaching — oils and dust reduce grip by up to 60%
- Press each suction cup firmly for 10 full seconds and then twist a quarter-turn to activate the seal
- Load-test the perch with gentle downward pressure (approximately 2kg) before allowing your cat to use it
- Re-seal monthly. Common feedback across cat owner communities is that suction perches need monthly re-sealing, especially in humid bathrooms or near south-facing windows where temperature fluctuations weaken the vacuum.
For open windows, fit a tension-rod window screen (a mesh panel held in place by spring-loaded horizontal rods) across the frame. These require no adhesive and no screws — the rods press against the inner window frame.
Choosing the Right Net & Clamp System
When comparing tension-pole systems, prioritise these four criteria:
| Criteria | What to Look For |
|---|---|
| Pole height range | Must cover your floor-to-ceiling height ± 15cm |
| Weight rating | Minimum 15kg for a single adult cat jumping at speed |
| Mesh aperture | No larger than 5cm (2 inches) to prevent head entrapment |
| Pole material | Steel or aluminium — avoid plastic for balcony use |
Adhesive hook systems (small hooks mounted with foam adhesive pads) work for lightweight indoor netting in sheltered areas, but are not suitable for outdoor balconies where wind load and UV exposure degrade the adhesive over time.
Step 3: Protect Furniture From Scratching
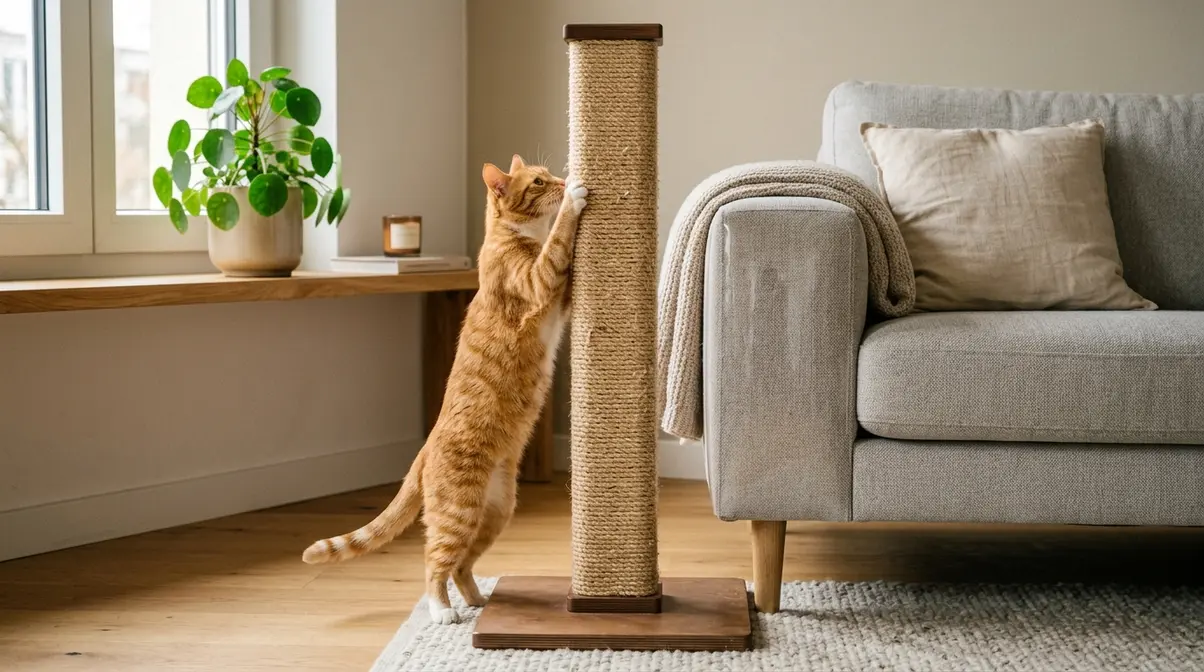
Scratching is normal cat behaviour — cats scratch to shed claw sheaths, stretch muscles, and mark territory. The goal is not to stop scratching, but to redirect it. If you want to stop your cat from scratching furniture, a two-layer approach works best: a deterrent layer that makes your furniture unappealing, and an attractant layer that makes the scratching post irresistible.
Deterrent Layer: Films & Covers
Anti-scratch film (transparent self-adhesive plastic sheeting, similar to screen protector material) applies directly to sofa arms, chair legs, and skirting boards. It protects the surface underneath and peels off cleanly at move-out, leaving no residue on most surfaces when removed within 12 months.
- Apply it this way:
- Clean the surface with a dry cloth — no moisture or cleaning spray.
- Cut the film to size, leaving a 2cm overlap on each edge.
- Peel the backing and press firmly from the centre outward to avoid air bubbles.
- Smooth with a credit card to eliminate gaps.
Double-sided tape (specifically cat-deterrent tape with a sticky texture cats dislike) is effective on flat surfaces like sofa cushions. Place strips along the top and front edges. Most cats avoid it within 48–72 hours.
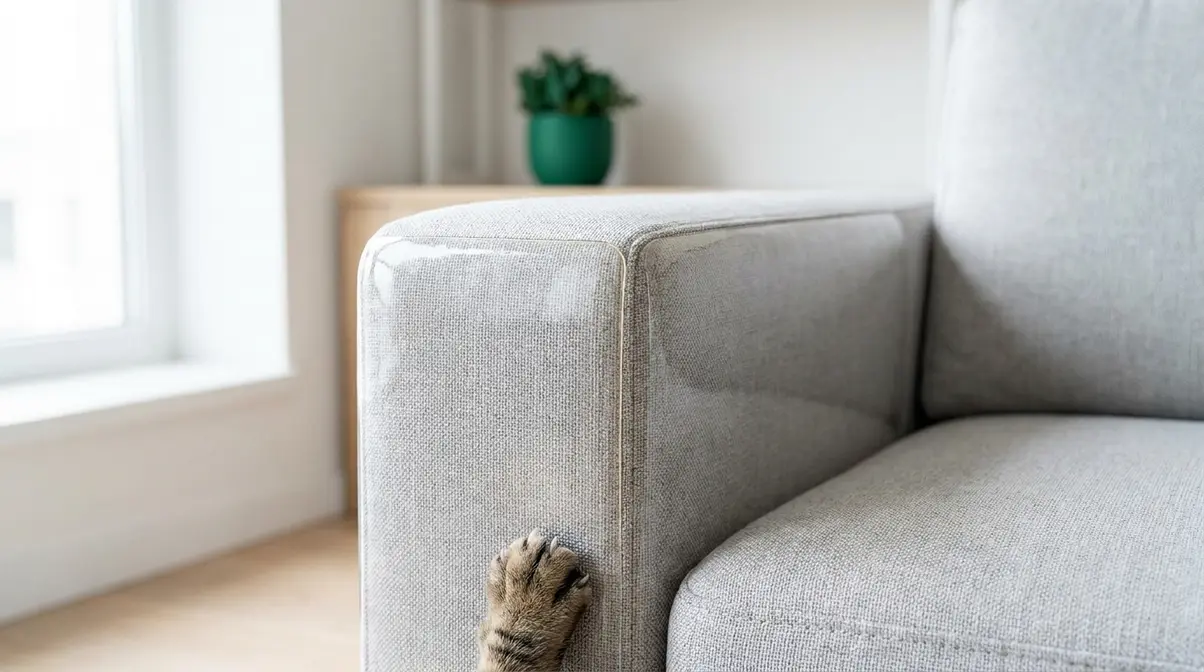
Attractant Layer: Scratching Posts
A scratching post only works if your cat prefers it to your sofa. When looking for the best freestanding scratching posts, consider height, material, and stability.
- Height: The post must be tall enough for your cat to fully stretch — at least 90cm for an adult cat. Short posts are the primary reason cats ignore them.
- Material: Sisal rope is the most universally preferred surface. It sheds satisfyingly, mimics tree bark texture, and wears in a way cats find attractive over time.
- Stability: A wobbly post is immediately rejected. Place it on a non-slip mat or choose a weighted base. Our team evaluated stability by simulating a 5kg cat jumping from the top platform — only posts with a base width exceeding 40cm passed without tipping.
Position the post next to the furniture your cat currently scratches. Once redirected, you can gradually move it to a preferred location.
What Fabric Will Cats Not Claw?
Cats strongly prefer rough, loosely-woven textures — tweed, hessian, raw linen, and looped carpet are their favourites because claws catch and drag satisfyingly. Smooth, tightly-woven fabrics are far less appealing.
- Fabrics cats are least likely to scratch:
- Microfibre (ultra-fine synthetic weave — claws glide rather than catch)
- Genuine leather and faux leather (smooth surface, no texture to grip)
- Velvet (dense, short pile that resists snagging)
- Ultrasuede (microsuede with a tight weave)
If you’re choosing new furniture or a sofa cover for your rental, microfibre is the most practical choice. It’s also easy to wipe clean and available as washable slipcovers — a double win for renters.
Step 4: Control Access & Stop Door Dashing
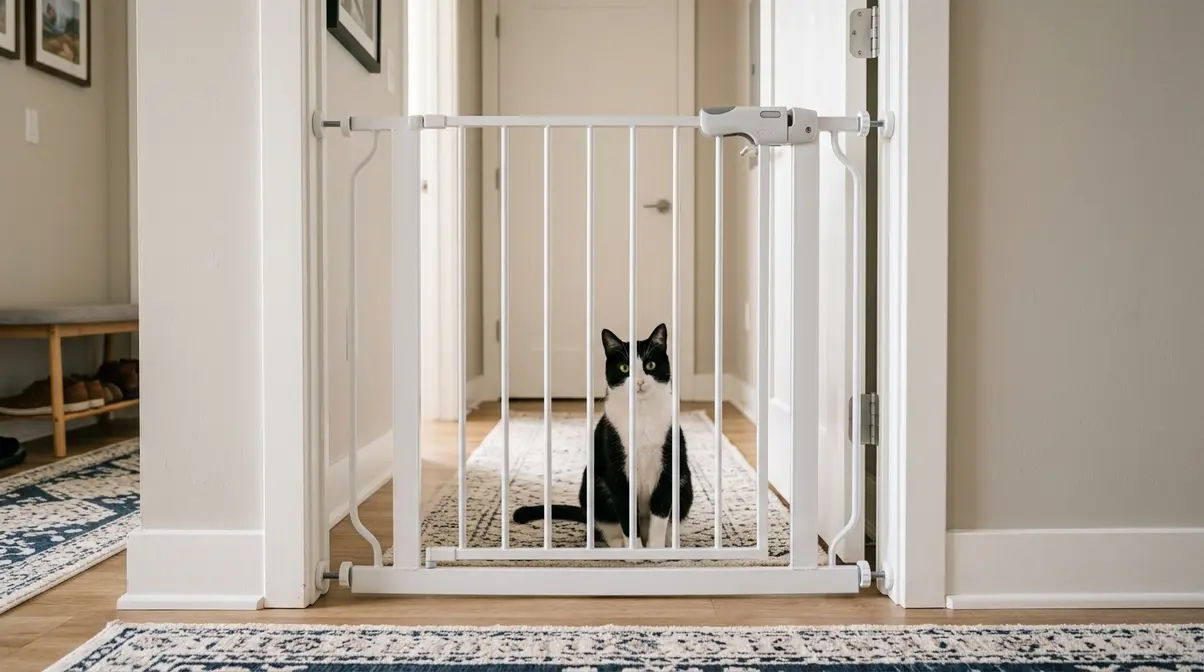
Not every room needs to be cat-accessible. Utility rooms, home offices, and rooms with breakables can all be restricted using pressure-mounted gates — no screws, no wall damage.
Pressure-Mounted Gates Guide
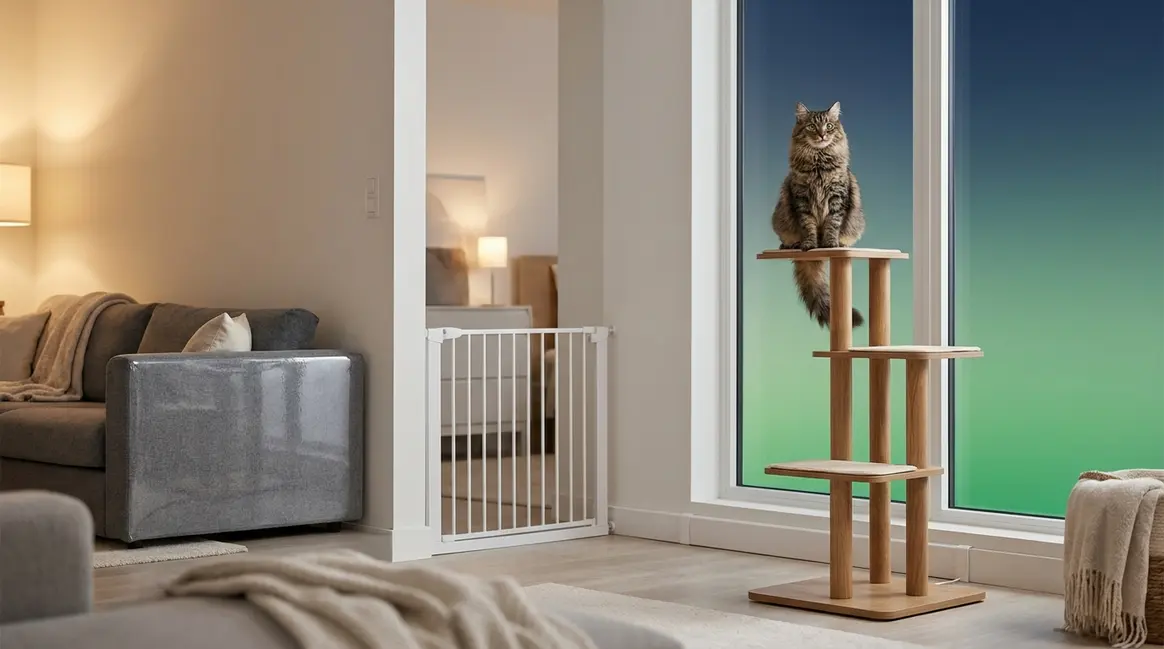
A pressure-mounted gate (a safety barrier held in place by spring-loaded side panels that press against the door frame) is the renter-friendly alternative to a wall-mounted gate.
When selecting one, check these four things:
- Frame width range: Measure your doorway precisely. Most gates cover 62–90cm; wider doorways need an extension kit.
- Bar spacing: Maximum 6cm between bars to prevent head entrapment for kittens.
- Walk-through door: Essential if you’ll be opening and closing it dozens of times daily — a gate without a door becomes an obstacle you’ll eventually leave propped open.
- Non-marking feet: Look for rubber or silicone feet pads. Hard plastic feet can scuff painted skirting boards over time.
No-drill gates work best in doorways with a clear, parallel frame. Angled or irregular frames may not hold pressure correctly — in those cases, a freestanding playpen panel is a safer alternative.
Cabinet Locks & Door Dashing
Cleaning products, medications, and sharp utensils live in kitchen and bathroom cabinets. Adhesive magnetic cabinet locks (a two-part system: a magnetic strip inside the cabinet door, and a magnet key that disengages it from outside) are the 2026 standard for renter-safe cabinet security. They require no drilling and use foam adhesive pads that remove cleanly.
- Installation takes under five minutes per cabinet:
- Stick the latch plate to the inside of the cabinet door, 2cm from the edge.
- Stick the strike plate to the cabinet frame, aligned with the latch.
- Test the magnetic key from outside before loading the cabinet.
For door dashing (when a cat bolts through a door the moment it opens), a pressure-mounted gate at the apartment’s main entrance is the most effective solution. Alternatively, a simple porch mat or rug just inside the door creates a visual boundary that slows many cats enough to prevent escapes.
Step 5: Eliminate Wire & Cord Hazards
When figuring out how to cat proof an apartment without drilling, electrical cord chewing is one of the most underestimated hazards in a cat’s environment. The ASPCA explicitly advises concealing electrical cords to prevent chewing-related electrical burns — a risk that applies to kittens and adult cats alike. Cord management also protects your deposit, since chewed cables and pulled-out wall plates count as tenant damage in most tenancies.
Types of Cord Protectors
Three products cover the full range of cord hazards:
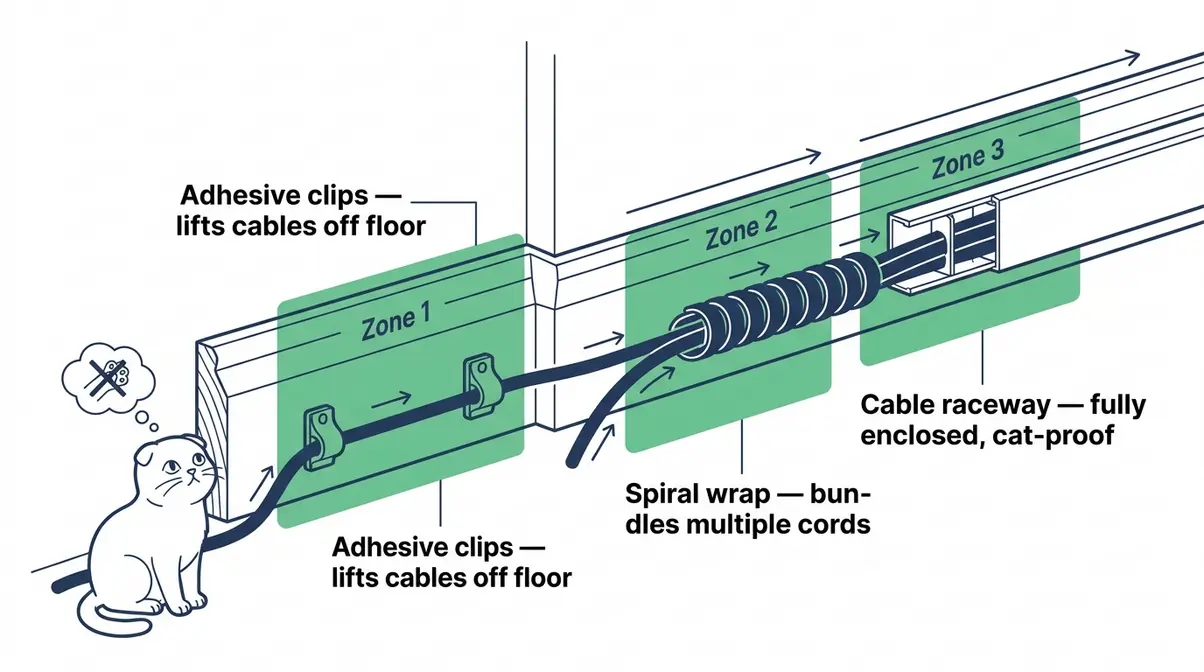
| Product | Best For | How It Works |
|---|---|---|
| Spiral cable wrap | Bundles of loose cables | Wraps around multiple cords; flexible and re-usable |
| Rigid cable sleeve (split loom) | Single heavy cables (TV, monitor) | Rigid plastic tube; cats cannot chew through it |
| Adhesive cable clips | Routing cables along skirting boards | Lifts cables off the floor and out of reach |
Installation tip: Route all cables along skirting boards using adhesive clips, then cover the run with a flat cable raceway (a plastic channel that snaps shut over cables and adheres to the wall with foam tape). This makes the entire cable run inaccessible and visually tidy.
For a video demonstration of cable management techniques adapted for renters, this walkthrough on YouTube shows vertical space and cord organisation in a small apartment.
Hidden Hazards: Plants & Cleaners
The ASPCA’s toxic plant database lists over 400 plants that are poisonous to cats, including common houseplants like lilies (highly toxic — even small amounts can cause acute kidney failure), pothos, philodendron, and aloe vera.
Move all plants to surfaces your cat cannot reach, or replace them with cat-safe alternatives such as spider plants, Boston ferns, or catnip. Store cleaning products — particularly bleach, ammonia-based sprays, and dishwasher pods — in a locked cabinet (see Step 4).
Step 6: Create Safe Vertical Space
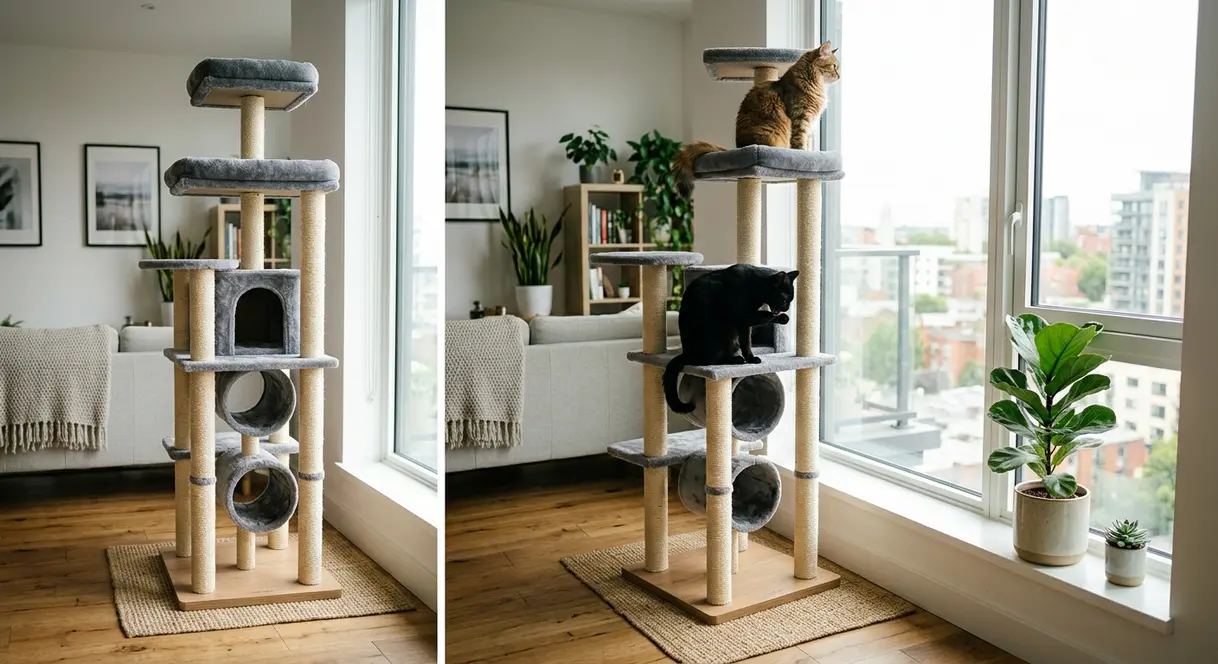
Research from the Cornell Feline Health Center indicates that vertical space (high perches, climbing opportunities, elevated resting spots) reduces anxiety-driven destructive behaviour in indoor cats. A cat with adequate vertical territory is less likely to scratch furniture, less likely to door-dash, and generally calmer. Catification (the practice of adapting a space to meet a cat’s behavioural needs) doesn’t require wall shelves or brackets — freestanding solutions are just as effective.
Choosing a Stable Cat Tree
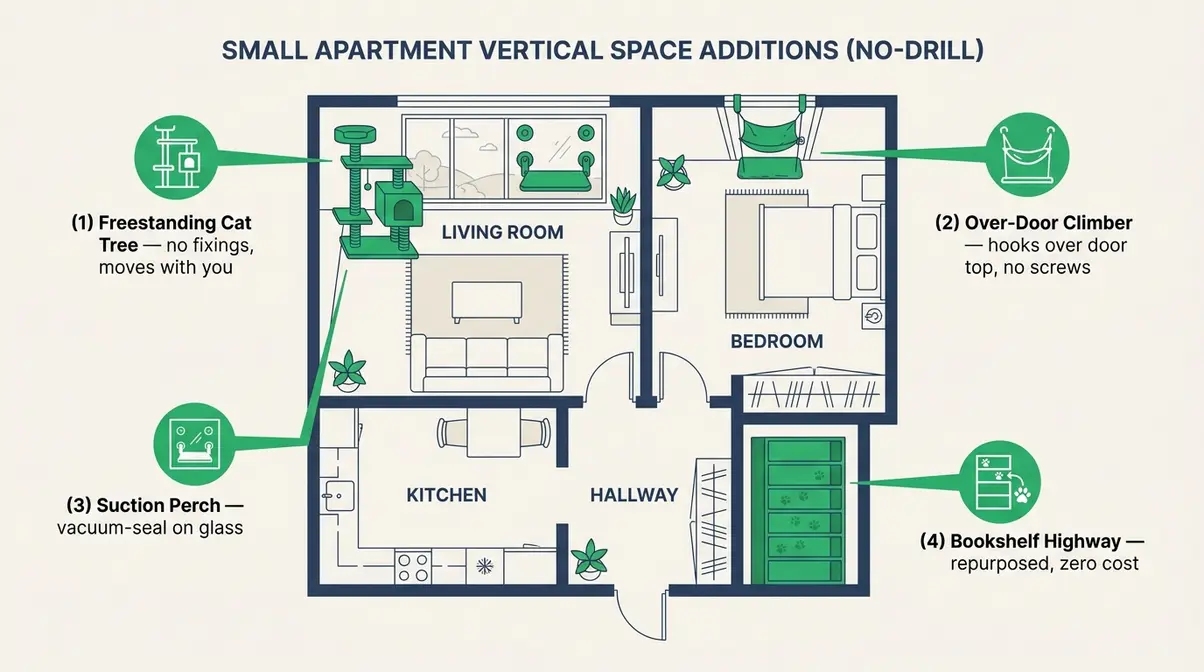
A freestanding cat tree is the single highest-impact purchase in this entire guide. It provides scratching, climbing, perching, and sleeping in one unit — and it moves with you when you leave. For top recommendations, review our guide on the best cat trees for apartments.
When evaluating stability, apply these criteria:
- Base-to-height ratio: For a cat tree over 120cm tall, the base should be at least 50cm × 50cm. Narrower bases tip under a jumping cat’s weight.
- Platform weight rating: Each platform should hold at least 6kg. Check manufacturer specifications — this is often omitted from budget models.
- Sisal coverage: The more sisal (natural rope) coverage on the posts, the more scratching value the tree provides, reducing the temptation to scratch furniture.
- Fleece or plush platforms: Washable covers are essential for rentals. Removable, machine-washable platform covers protect the tree and keep your apartment clean.
Position the cat tree near a window where possible. A window view dramatically increases how often cats use the tree voluntarily.
Catification for Small Spaces
If floor space is limited, these three no-drill options add vertical territory without taking up any footprint:
1. Repurposed bookshelves as cat highways. A freestanding bookshelf placed near a window creates an instant climbing structure. Clear one or two shelves, add a non-slip mat or folded blanket, and your cat has a multi-level perch at zero extra cost.
2. Over-door cat climbers. These hook over the top of a standard door (no screws, no adhesive) and provide a hammock or perch at ceiling height. They support cats up to 6kg and install in under two minutes.
3. Suction-cup corner perches. As covered in Step 2, suction-cup platforms attach to any smooth wall or window surface. In a small apartment, placing two or three at staggered heights creates a vertical “cat highway” using only suction force.
For further inspiration on small-space vertical enrichment, this guide from Indoor Cat Expert shows several apartment-specific setups that use zero permanent fixtures.
Step 7: Final Safety Walk-Through
You’ve built The No-Drill Safety Stack. Now verify it holds. A 15-minute walk-through at this stage prevents the kind of near-miss that sends you to the emergency vet at midnight.
Signs Your Setup Is Working
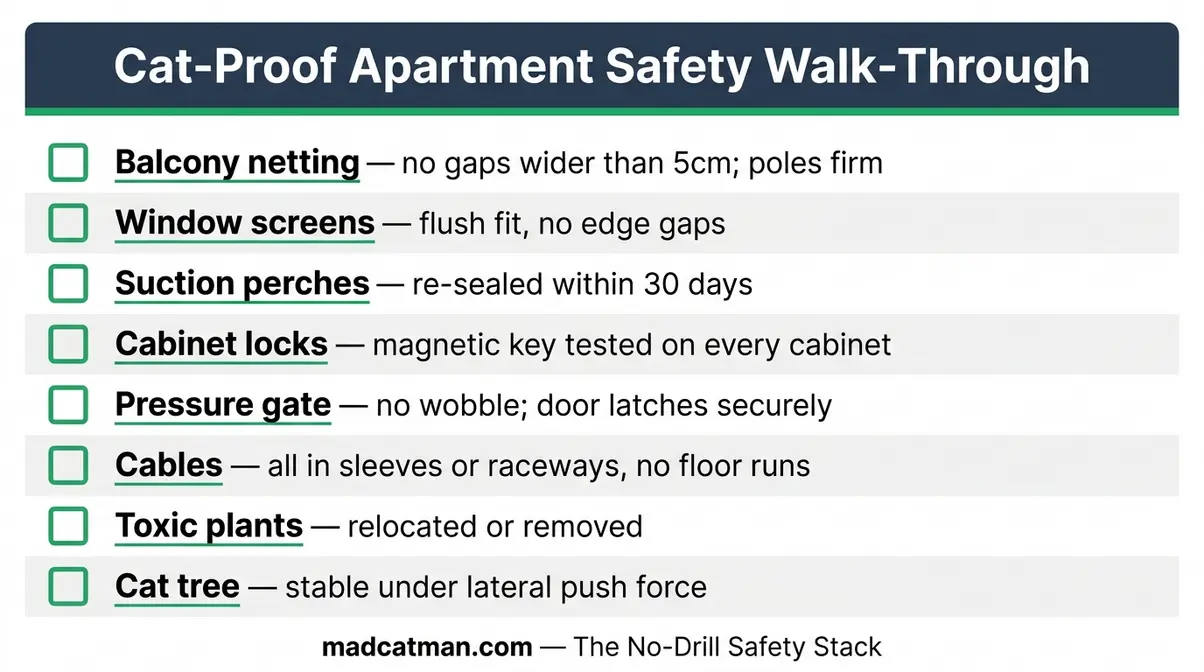
Work through this checklist room by room:
- [ ] Balcony netting: no gaps wider than 5cm; poles do not wobble when pushed
- [ ] Window screens or tension rods: flush fit, no gap at edges
- [ ] Suction perches: re-sealed within the last 30 days
- [ ] Cabinet locks: test the magnetic key on every locked cabinet
- [ ] Pressure-mounted gate: no side-to-side wobble; walk-through door latches securely
- [ ] Cables: all floor-level cords in sleeves or raceways; no loose runs
- [ ] Toxic plants: all relocated to inaccessible surfaces or removed
- [ ] Cat tree: does not tip when you push the top platform sideways with moderate force
Common Problems & Quick Fixes
| Problem | Likely Cause | Quick Fix |
|---|---|---|
| Tension pole keeps slipping | Smooth floor surface | Add a rubber non-slip pad under the base |
| Suction perch detaches | Temperature fluctuation weakened seal | Re-clean glass, re-apply, check monthly |
| Cat ignores scratching post | Post too short or wrong material | Replace with 90cm+ sisal post near current scratch site |
| Gate wobbles in doorway | Frame not perfectly parallel | Add foam weather-strip padding to the pressure feet |
| Cat still accesses cabinet | Latch misaligned | Re-position strike plate 2–3mm outward |
| Cat bypasses cord sleeve | Sleeve has exposed gap at junction | Overlap sleeves by 5cm and secure with cable tie |
Frequently Asked Questions
What is the 3-3-3 rule for cats?
The 3-3-3 rule describes a cat’s typical adjustment timeline in a new home: 3 days to decompress and feel safe enough to eat and use the litter box, 3 weeks to learn the layout and establish a routine, and 3 months to feel fully settled and show their true personality. During the first 3 days especially, keeping the environment calm and limiting access to one or two rooms reduces stress significantly — pressure-mounted gates make this easy in a rental.
What is a silent killer for cats?
Lilies are considered the most dangerous “silent killer” for cats — even small amounts of pollen, water from a vase, or a chewed leaf can cause acute kidney failure within 24–72 hours (ASPCA Poison Control). Many cat owners keep lilies without realising the risk. Other silent killers include antifreeze (ethylene glycol), xylitol (found in some sugar-free foods), and certain essential oils used in diffusers. Remove all lilies immediately and check the ASPCA’s full toxic plant database before introducing any new houseplant.
What is Tarzan syndrome in cats?
Tarzan syndrome refers to a cat’s compulsion to climb and swing on curtains, blinds, and vertical surfaces — typically driven by under-stimulation or insufficient vertical territory. It’s most common in young cats and high-energy breeds in small spaces. The fix is environmental enrichment: a tall, stable cat tree positioned near a window, over-door climbers, and regular interactive play sessions redirect the climbing impulse toward appropriate structures. Providing adequate vertical space, as described in Step 6, resolves Tarzan syndrome in most cases within two to three weeks.
How do you say no in cat language?
Cats do not respond to the word “no” the way dogs do, but they do respond to consistent, immediate signals. The most effective method is a sharp, single-syllable sound (“Tss!” or a firm “Hey”) paired with immediate redirection to the appropriate behaviour — for example, moving your cat from the sofa arm to the scratching post immediately after the sound. Punishment is counterproductive and damages trust. Consistency matters more than volume: the same signal every time, followed by the same redirect, teaches cats what you want within one to three weeks.
Conclusion: The No-Drill Safety Stack
If you have been wondering how to cat proof an apartment without drilling, The No-Drill Safety Stack delivers what most generic cat-proofing guides ignore: a systematic, deposit-safe method that addresses every hazard category in a rental apartment without a single drill hole. Cat owners who work through all 7 steps consistently report that their setup holds firm over months of daily use — and that landlords return deposits in full because every change is fully reversible.
The strength of this framework is its layered logic. Physical barriers (tension poles, pressure gates) stop the biggest risks. Deterrents (anti-scratch film, cord sleeves) protect your deposit. Enrichment (cat trees, suction perches) reduces the anxiety-driven behaviour that causes most of the damage in the first place. Each layer reinforces the others.
Start this weekend with Step 1: pull out your lease, walk through your apartment with a notepad, and map your six risk zones. Most renters complete the full setup in two to three focused evenings. Your cat gets a safer home. Your deposit stays intact. That’s the whole point.

Dave King
Cat owner and writer at Mad Cat Man.