
You’ve spotted the mats. Maybe they’re small and fluffy, or maybe they’ve already pressed flat against the skin in a tight, felt-like knot. Either way, you’re worried — and that worry makes complete sense. Knowing how to remove mats from cat fur safely is genuinely difficult when you’re starting from scratch, especially when your cat squirms the moment you reach for him.
What’s in this guide
- ⚠️ Why Scissors Are Dangerous
- What You'll Need Before You Start
- Step 1 — Calm Your Cat and Assess the Mat
- Step 2 — Hold the Base to Protect the Skin
- Step 3 — Apply a Mat-Loosening Agent
- Step 4 — Gently Separate the Mat with Your Fingers and Comb
- Step 5 — Use Clippers for Dense or Skin-Level Mats
- Step 6 — Handle an Anxious or Uncooperative Cat
- Step 7 — Finish, Reward, and Prevent Future Mats
- When to Stop and See a Professional
- Troubleshooting: Common Mistakes and How to Fix Them
- Frequently Asked Questions
- Keeping Your Cat Mat-Free Going Forward
“They are pretty close to the skin so I don’t feel comfortable using scissors as he moves around a lot.”
That fear is shared by thousands of cat owners every day, and it’s exactly the right instinct. Cat skin is paper-thin — Cornell University’s Feline Health Center notes that feline skin is far more delicate than human skin, making scissor injuries a genuine and serious risk even for experienced groomers. This guide gives you a safe, step-by-step process for removing cat mats at home, built around a single foundational technique called The Base-Hold Method. You’ll also learn exactly when to stop and call a professional.
⚠️ Why Scissors Are Dangerous
Stop before you reach for the scissors. This warning comes first because it is the single most important piece of information in this entire guide.
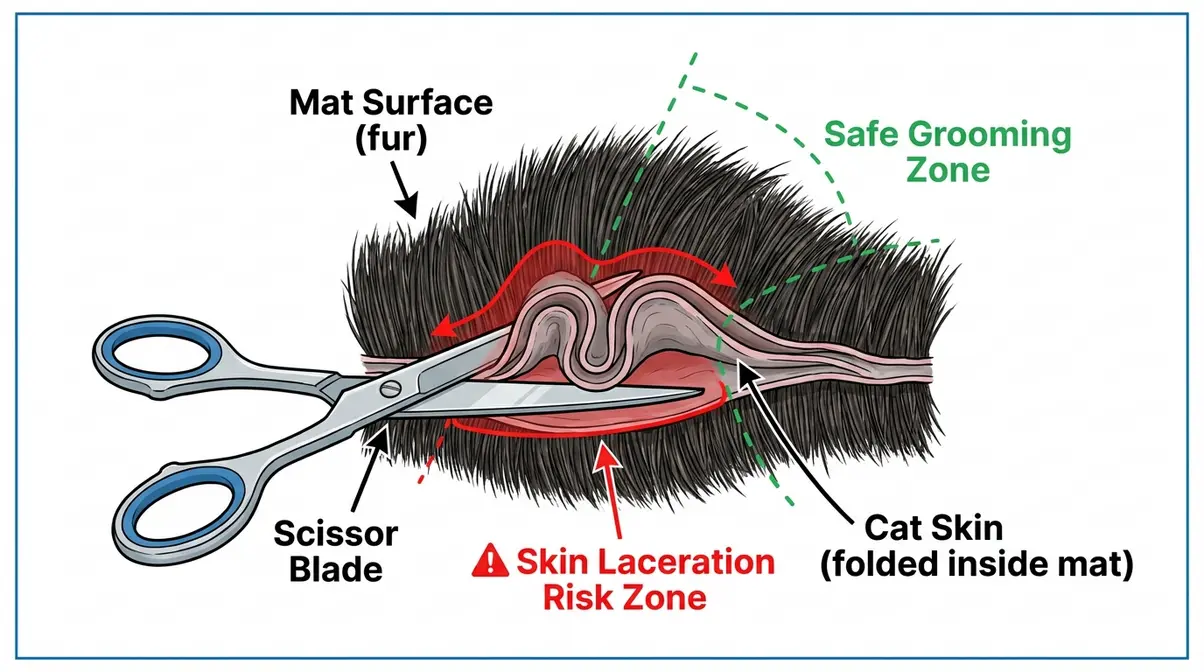
Cat skin is remarkably thin — roughly 0.4 mm in some areas, compared to human skin at 1–2 mm (Cornell University Feline Health Center). When a mat forms and tightens, the skin beneath it folds and bunches upward, filling the space inside the mat. From the outside, the mat looks like a lump of fur sitting on top of the skin. In reality, the skin is often inside the mat itself.
When you slide scissors into that mat to cut it off, you cannot see where the skin ends and the fur begins. Groomers and veterinary staff call this a “tent cut” — the blade slips under a fold of skin and slices through it before you realize what has happened. The wound is often deep, painful, and requires veterinary suturing.
⚠️ Safety Warning: Veterinary sources, including Cornell University’s College of Veterinary Medicine, strongly advise against using household scissors on matted cat fur. If a mat is close to the skin, do not attempt to cut it. Use a dematting comb, clippers with a safety guard, or consult a professional groomer instead.
Beyond the laceration risk, untreated mats cause real health problems. According to the Ohio State University Veterinary Medical Center, mats trap moisture, debris, and bacteria against the skin, creating conditions that rapidly lead to acute moist dermatitis (a painful skin infection also called a “hot spot”) and skin ulceration. The longer a mat remains, the more damage it causes — which is why acting carefully but promptly matters.
Should I remove my cat’s matted fur?
Yes — mats should be removed, but the method must match the severity. Left in place, mats tighten progressively, trap moisture and bacteria, and cause painful skin infections called hot spots (Ohio State University Veterinary Medical Center). Minor mats — soft, liftable, and away from the skin — are safe to address at home using the techniques in this guide. Hard, skin-level, or large mats should be removed by a professional. The key question is not whether to remove the mat, but who should remove it.
What You’ll Need Before You Start
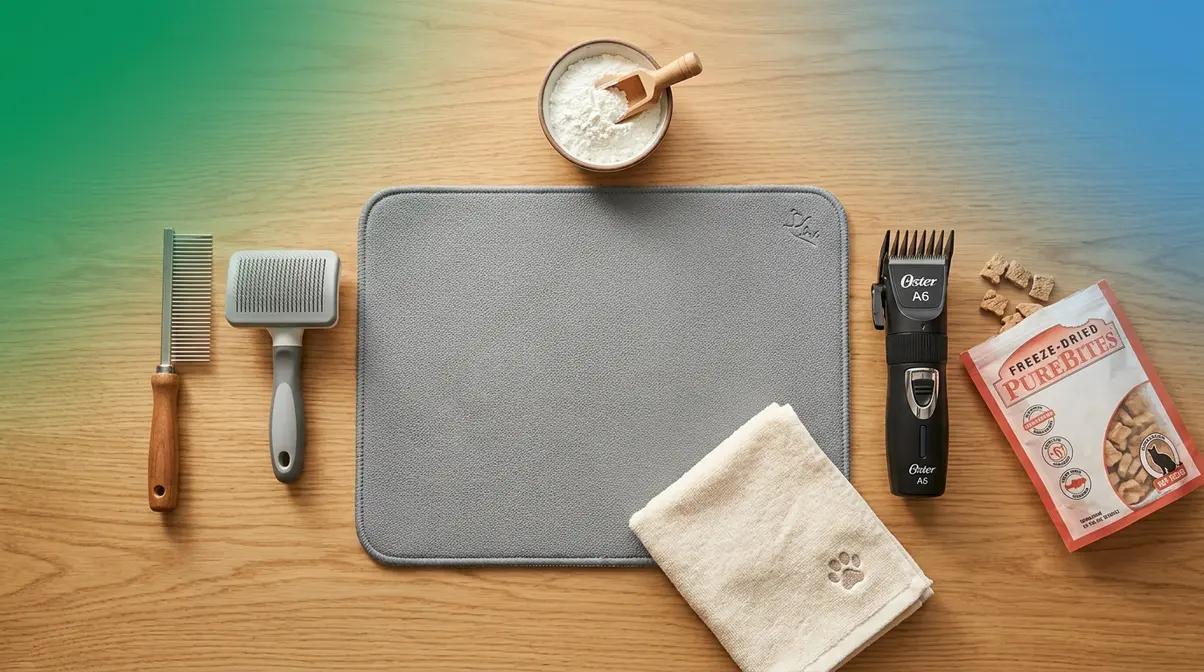
Gather your tools before you bring your cat into the grooming area. Stopping mid-session to search for a comb will frustrate your cat and make the rest of the process harder.
Estimated Time: 15–30 minutes
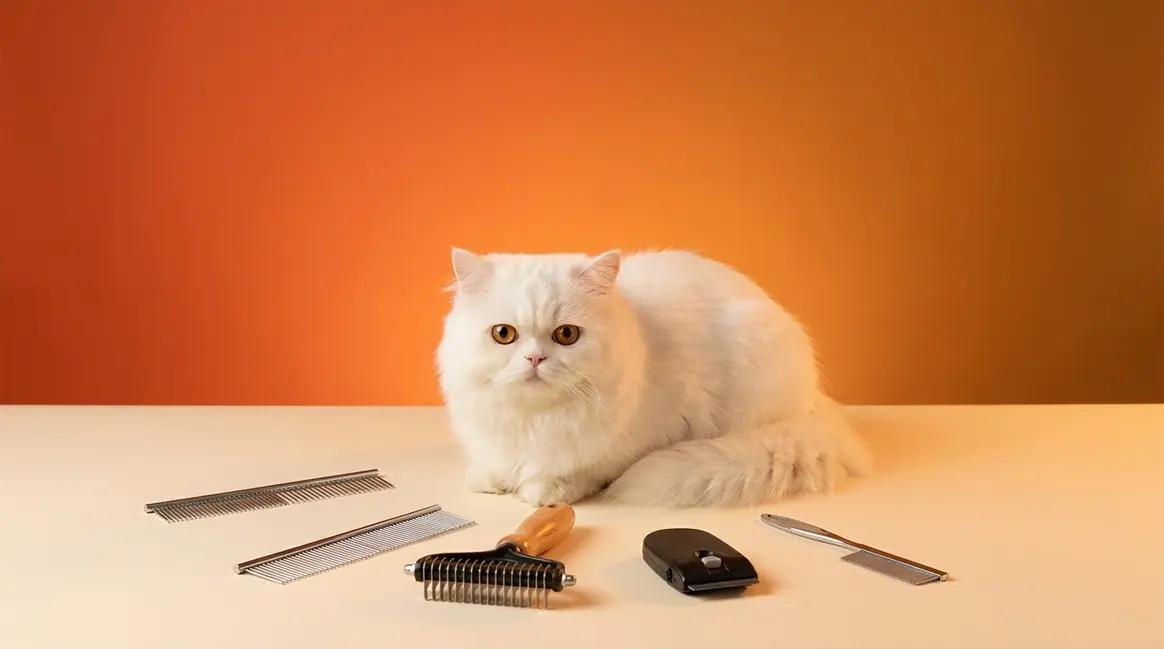
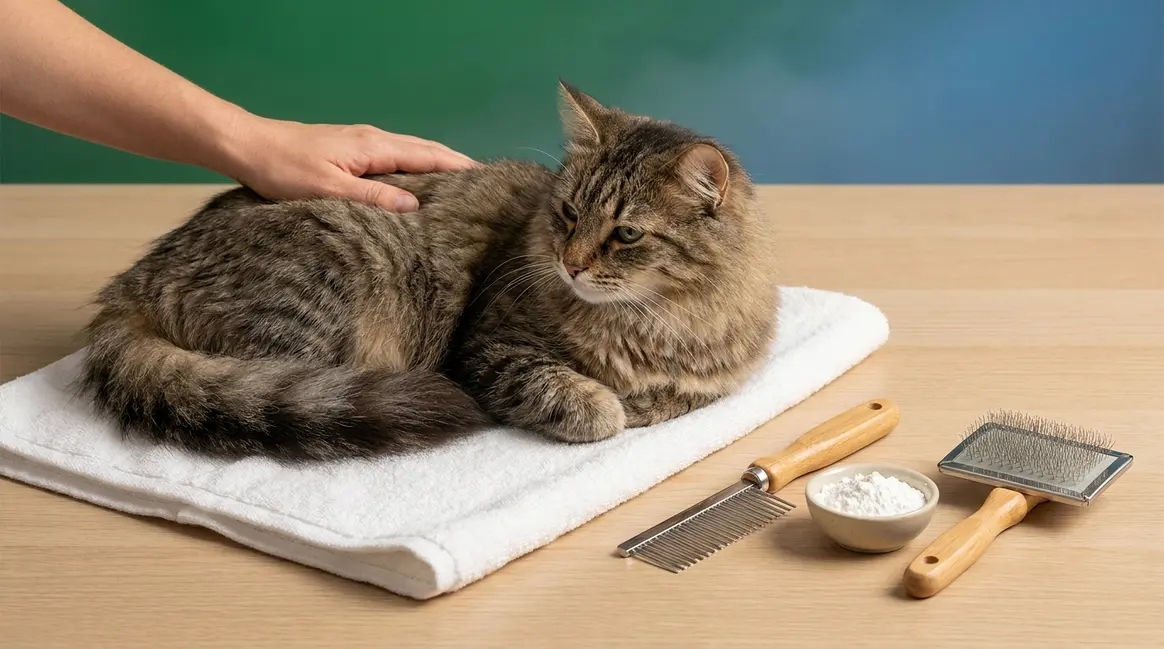
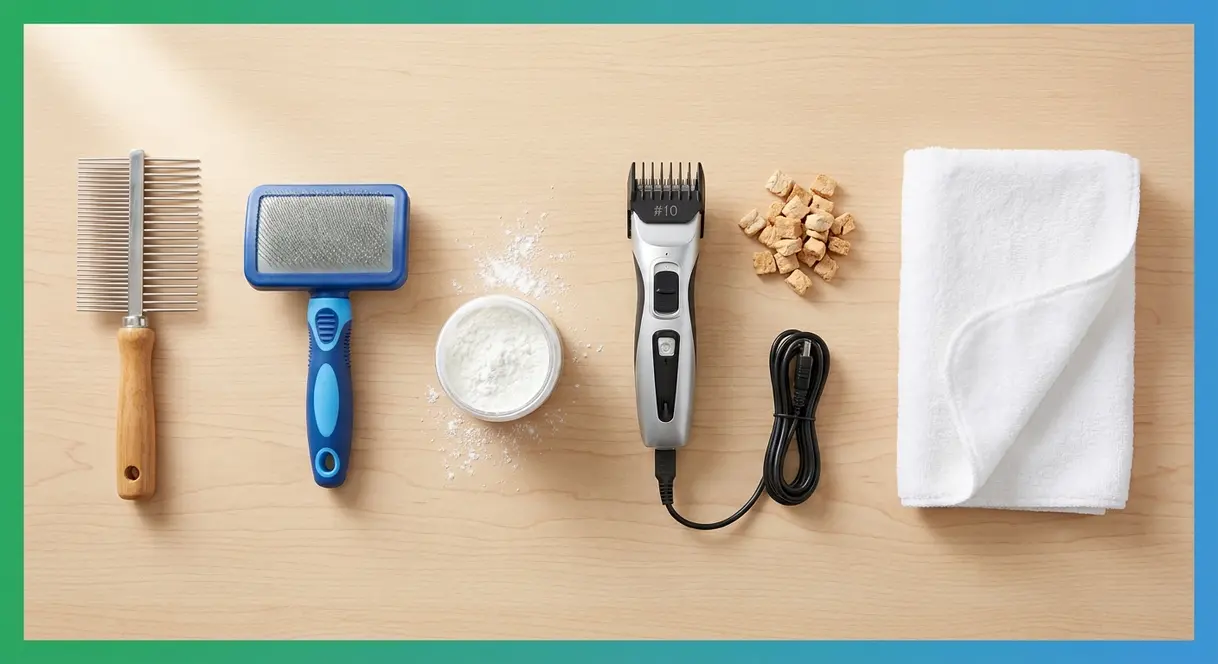
Your mat-removal toolkit:
| Tool | Purpose | Notes |
|---|---|---|
| Wide-tooth dematting comb | Separating mat fibers gently | Look for rounded, not sharp, tines |
| Slicker brush | Finishing and fluffing after mat removal | Use after the mat is broken up |
| Cornstarch (plain, unscented) | Lubricating the mat before combing | Safer than oil — see Step 3 |
| Cat-safe clipper with a #10 guard | Removing solid, dense mats | Never use without the guard attached |
| Soft towel or non-slip mat | Keeping your cat stable and comfortable | Place on a flat surface |
| High-value treats | Rewarding calm behavior throughout | Freeze-dried chicken or tuna work well |
| Blunt-tipped grooming scissors | Emergency only — trimming stray hairs after mat removal | Do NOT use inside a mat |
What you do NOT need: Regular household scissors, a razor blade, or any product containing tea tree oil (toxic to cats). Keep these out of your grooming area entirely.
Professional groomers recommend having everything laid out and within arm’s reach before your cat enters the space. A calm, organized setup reduces your own anxiety — and cats read that energy immediately.
Step 1 — Calm Your Cat and Assess the Mat
Before any tool touches your cat, you need two things: a calm cat and a clear picture of what you’re dealing with. Rushing this step is the most common mistake anxious owners make, and it turns a manageable mat into a stressful struggle.
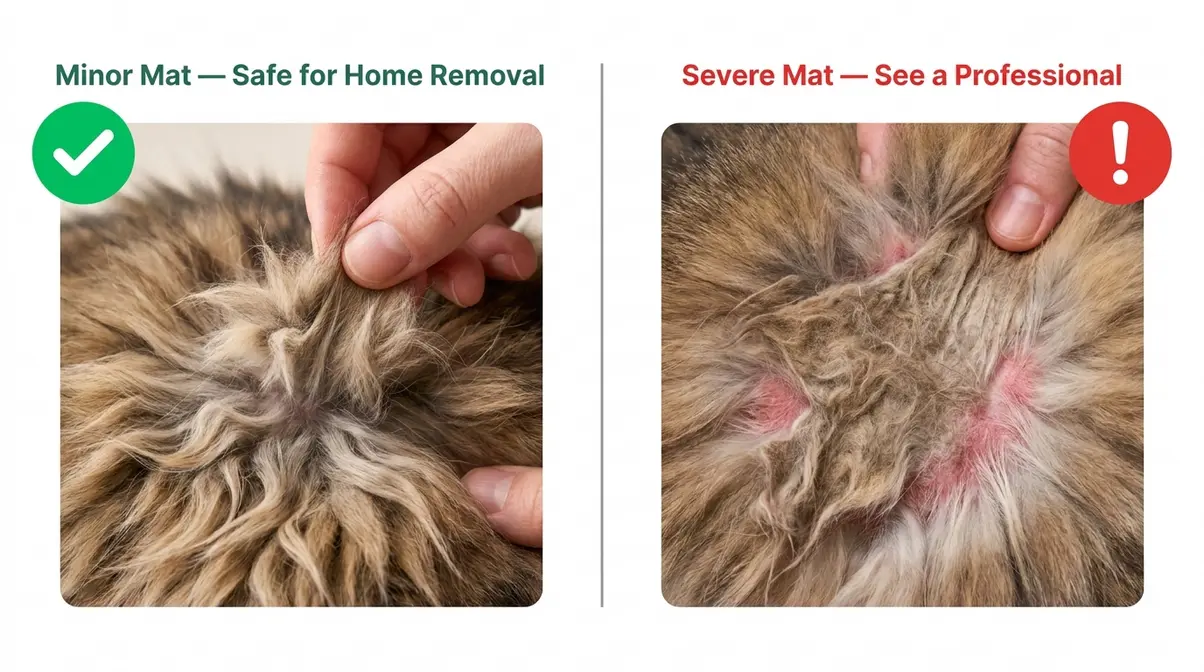
How to Tell If a Mat Is Minor or Severe
Not all mats are equal. Knowing the difference determines whether you should attempt home removal or go straight to a professional.
- Minor mat (home removal is appropriate):
- Feels soft and fluffy when you squeeze it
- You can slide two fingers underneath it, between the mat and the skin
- The fur around it is loose and moves freely
- Your cat doesn’t flinch or pull away when you gently touch it
- Severe mat (professional help required):
- Feels hard, dense, or board-like — “pelted against the skin”
- You cannot slide a finger underneath it
- The skin looks red, irritated, or raw at the edges
- Multiple mats have merged into a single large panel
- Your cat vocalizes, hisses, or bites when the area is touched
According to the Merck Veterinary Manual, pelted matting — where mats have fused across a large area — requires professional clipping under controlled conditions, often with sedation. Attempting to remove this type of mat at home risks serious injury to both you and your cat.
Reading Your Cat’s Body Language Before You Touch the Mat
A cat that is tense, fearful, or in pain will not cooperate — and forcing the issue causes lasting trust damage. Veterinary sources and professional groomers agree that reading your cat’s body language before you begin is a non-negotiable safety step.
- Signs your cat is calm enough to proceed:
- Slow blinking or half-closed eyes
- Relaxed, loose posture — not hunched or rigid
- Tail resting still or curling gently
- Accepting gentle touch on the back and shoulders without flinching
- Signs to stop immediately and try again later:
- Flattened ears (“airplane ears”)
- A low, twitching tail
- Dilated pupils
- Skin rippling or twitching along the back
- Growling, hissing, or turning to bite
If your cat shows any stress signals, end the session. Offer a treat, give them 30 minutes of quiet time, and try again. Forcing a frightened cat into a grooming session escalates quickly to scratches and bites — for both of you.
Five calming techniques used by professional groomers:
- Pheromone spray: Apply an Feliway-type synthetic pheromone spray to the towel 15 minutes before the session begins.
- Warm-up handling: Spend 5 minutes simply petting your cat in a familiar spot before moving to the mat area.
- Treat loading: Give a small high-value treat every 20–30 seconds during the session to keep your cat’s focus positive.
- The scruff pause: If your cat tenses suddenly, gently rest your hand on the scruff (the loose skin at the back of the neck) without gripping — many cats find this briefly calming.
- Session limits: Cap each grooming session at 5–10 minutes. Multiple short sessions are far more effective than one long, stressful one.
Step 2 — Hold the Base to Protect the Skin
When learning how to remove mats from cat fur, the single most important physical technique in this entire guide is also the simplest: hold the mat at its base before you do anything else. Everything else — the comb, the clippers, the loosening agent — only works safely if this step is done correctly.
The Base-Hold Method: Your Most Important Safety Technique
The Base-Hold Method is the practice of gripping the mat firmly between your thumb and index finger at the point where the mat meets the skin, creating a barrier that absorbs combing tension before it reaches the skin itself.
Here is why it works: when you comb a mat without holding the base, every stroke of the comb pulls directly on the skin. That pull is painful, it causes your cat to flinch and move, and it increases the risk of a skin tear. When you hold the base, the tension travels from the comb through the mat and into your fingers — not your cat’s skin. Your grip acts as a shock absorber.
How to perform The Base-Hold Method correctly:
- Locate the base of the mat — the point closest to the skin where the tangled fur begins.
- Pinch the base firmly between your thumb and index finger. Your fingers should sit flat against the skin, not lifted away from it.
- Hold that grip throughout every single comb stroke. Do not release between strokes.
- Work from the outer tip of the mat inward toward the base. Never drag the comb from the skin outward — this pulls the skin with it.
- If your cat flinches, check your grip. The base-hold may have slipped.
Cat owners commonly report that this one technique transforms the experience: their cat stops reacting to the comb because the pulling sensation disappears almost entirely. Professional groomers use a variation of this technique on every mat, regardless of size.
Step 3 — Apply a Mat-Loosening Agent
Before any comb touches the mat, apply a loosening agent to reduce friction between the tangled fur fibers. This step alone can cut your combing time in half and dramatically reduces the discomfort your cat feels.
What loosens matted cat fur?
Cornstarch is the most effective and safest at-home agent for loosening matted cat fur. Sprinkled directly onto the mat and worked in gently with your fingers, it coats the individual fur fibers and reduces the friction that holds them together. According to International Cat Care, dry grooming aids like cornstarch are preferable to oil-based products because they require no rinsing and won’t be ingested in problematic quantities when your cat grooms. For very dense mats, applying cornstarch and waiting 2–3 minutes before combing can reduce the force needed by a significant margin.
Using Cornstarch: The Safer Choice
Cornstarch is the loosening agent most recommended by professional groomers for at-home use, and for good reason. It is dry, non-toxic if ingested in small amounts during grooming, and works by coating individual fur fibers to reduce the friction that holds them together.
How to apply cornstarch:
- Sprinkle a small amount of plain, unscented cornstarch directly onto the mat.
- Gently work it into the mat with your fingers, separating the outer fibers slightly as you go.
- Wait 2–3 minutes to allow the cornstarch to penetrate the mat.
- Proceed to Step 4 — combing.
Cornstarch leaves no oily residue, does not require rinsing, and does not attract dirt the way oils can. International Cat Care notes that dry grooming aids like cornstarch are preferable for cats who dislike bathing or water-based products.
Using Coconut or Olive Oil: What to Know First
Oil-based loosening agents are frequently recommended online, but they carry risks that most guides fail to mention. According to International Cat Care, cats groom themselves constantly, meaning any substance applied to the fur will be ingested. While small amounts of coconut or olive oil are not acutely toxic, regular ingestion can cause gastrointestinal upset — and neither oil has been formally evaluated for safety in cats at grooming quantities.
Additionally, oil leaves a residue that attracts debris and can make future matting more likely if the fur is not thoroughly shampooed afterward. Shampooing a cat with mats, however, tightens the mats further — creating a problematic cycle.
- If you choose to use oil:
- Use only a few drops — the smallest amount that coats the mat
- Plan for a full bath with cat-safe shampoo after mat removal to remove all residue
- Do not use on cats with known digestive sensitivities
For most worried cat owners at home, cornstarch is the safer, simpler, and more effective choice.
Step 4 — Gently Separate the Mat with Your Fingers and Comb
Now that the base is held and the mat is treated, you’re ready to begin the actual separation. Work slowly. This is not a task to rush.
Initial separation steps:
- Maintain The Base-Hold with your non-dominant hand throughout this entire step.
- Start at the outer tip of the mat — the furthest point from the skin. Use your fingers to gently tease apart the outermost fibers first.
- Use the dematting comb in short, flicking strokes away from the skin. Stroke from the mid-point of the mat outward to the tip. Never drag from the skin outward.
Continuing the process:
- Work in layers. Once the outer portion of the mat is loosened, move slightly inward toward the base. Repeat the short-stroke combing.
- Pause every 2–3 strokes to check your cat’s body language. A flattened ear or tail twitch means you need to slow down or stop.
- Never force the comb through resistance. If the comb catches and won’t move, stop. Apply more cornstarch, wait, and try again with lighter pressure.
For mats that are dense but still liftable, professional groomers recommend splitting the mat vertically with your fingers before combing — dividing it into two smaller sections makes each half far easier to work through.
Step 5 — Use Clippers for Dense or Skin-Level Mats
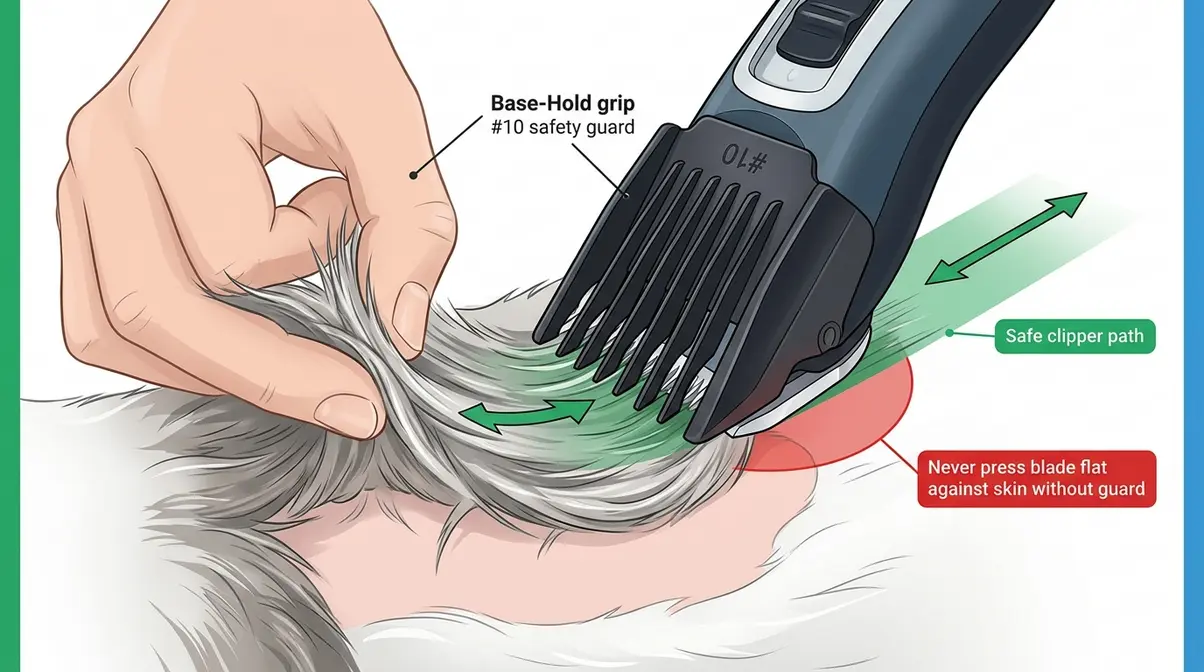
When a mat won’t yield to combing, clippers with a safety guard are your next tool — not scissors. This is the point where many home groomers make their most serious mistake, reaching for household scissors out of frustration.
The Merck Veterinary Manual confirms that electric clippers with a blade guard are the appropriate tool for mats that have become too dense to comb through. The guard creates a fixed distance between the blade and the skin, eliminating the risk of a scissor-type skin tent cut.
How to use clippers safely on a mat:
- Attach the appropriate guard — a #10 guard is standard for mat removal on most coat types.
- Maintain The Base-Hold Method with your non-dominant hand, lifting the mat slightly away from the skin.
- Slide the clippers underneath the mat, between the mat and your fingers, moving slowly in the direction of fur growth.
- Use short passes — do not try to remove the entire mat in one stroke.
- Check the skin after each pass. Stop immediately if you see any redness or broken skin.
- What not to do with clippers:
- Do not press the blade flat against the skin without a guard
- Do not clip wet fur — it bunches under the blade
- Do not use clippers near the face, ears, or genitals — these areas require a professional
For a deeper look at managing your cat’s overall grooming routine, our guide to safe matted fur removal techniques covers the preventative habits that stop mats from forming in the first place.
Step 6 — Handle an Anxious or Uncooperative Cat
If your cat won’t stay still, won’t tolerate touch near the mat, or becomes aggressive the moment you start, do not force the issue. This is the section that most online guides skip entirely — and it’s the reason many home grooming attempts fail.
Cat owners commonly describe a “kitty that won’t let me touch him” as their biggest obstacle. The problem is rarely stubbornness. More often, the cat has already learned that mat-touching is painful, or the mat itself is causing ongoing discomfort that makes any touch feel threatening.
Physical handling techniques:
- The Burrito Wrap: Wrap your cat snugly in a soft towel, leaving only the area with the mat exposed. This limits movement without causing pain and reduces the cat’s visual field, which lowers arousal.
- The Two-Person Hold: Have one person offer treats at the cat’s nose level to hold their attention, while the second person works on the mat. The treat-giver should stay at the cat’s head — never behind or above.
- The Micro-Session Method: Work for only 30–60 seconds at a time. Stop before the cat shows stress signals, give a treat, and let them walk away. Return in 10–15 minutes. This rebuilds trust across multiple sessions.
Environmental calming aids:
- Topical Calm Aids: A towel pre-sprayed with Feliway (synthetic feline facial pheromone) 15 minutes before the session can measurably reduce anxiety. Fear Free Pets, a veterinary-founded organization, endorses pheromone use as a first-line stress-reduction tool for at-home procedures.
- Strategic Distraction: A lick mat coated with a thin layer of tuna or wet food gives your cat something pleasurable to focus on during the session. Many cats tolerate significant mat work when their attention is occupied.
⚠️ If your cat bites, scratches, or becomes truly aggressive during mat removal: Stop immediately. A cat in that state is in pain or extreme fear. Forcing the session risks injury to you and serious psychological stress to your cat. Contact your veterinarian — sedation-assisted grooming is a safe, humane option for cats who cannot be handled without distress.
For more guidance on building a positive grooming relationship with a fearful cat, our complete stress-free cat grooming guide walks through a desensitization process you can start today.
Step 7 — Finish, Reward, and Prevent Future Mats
Once the mat is removed, your job isn’t quite done. Finishing correctly prevents skin irritation, rewards your cat’s cooperation, and — most importantly — sets up a prevention routine that stops this from happening again.
Post-removal finishing steps:
- Inspect the skin where the mat was. Look for redness, raw patches, or any signs of broken skin. If the skin looks irritated, apply a thin layer of aloe vera gel (pet-safe, non-toxic formulation) and monitor for 24 hours.
- Brush the surrounding fur with a slicker brush to smooth the coat and check for any smaller mats you may have missed nearby.
- Reward your cat immediately. Give their highest-value treat right now, while they are still in the grooming space. This creates a positive association with the experience.
- Clean your tools. Remove fur from the dematting comb and wipe clippers with a dry cloth. Keeping tools clean extends their life and prevents bacteria buildup.
Preventing mats from returning:
Regular brushing is the only reliable prevention strategy. Purina’s pet care resources recommend brushing long-haired cats at least 2–3 times per week, and daily during seasonal shedding periods. Short-haired cats typically need brushing once a week.
Pay particular attention to mat-prone areas: behind the ears, under the armpits (where the front legs meet the body), around the collar area, and at the base of the tail. These spots accumulate friction and moisture faster than the rest of the coat.
Prevention schedule by coat type:
| Coat Type | Brushing Frequency | Mat-Prone Areas to Check |
|---|---|---|
| Short-haired | Once weekly | Behind ears, collar area |
| Medium-haired | 2–3 times weekly | Armpits, base of tail |
| Long-haired | Daily | All of the above + belly |
| Senior or overweight cat | Daily | Anywhere cat can’t self-groom |
When to Stop and See a Professional
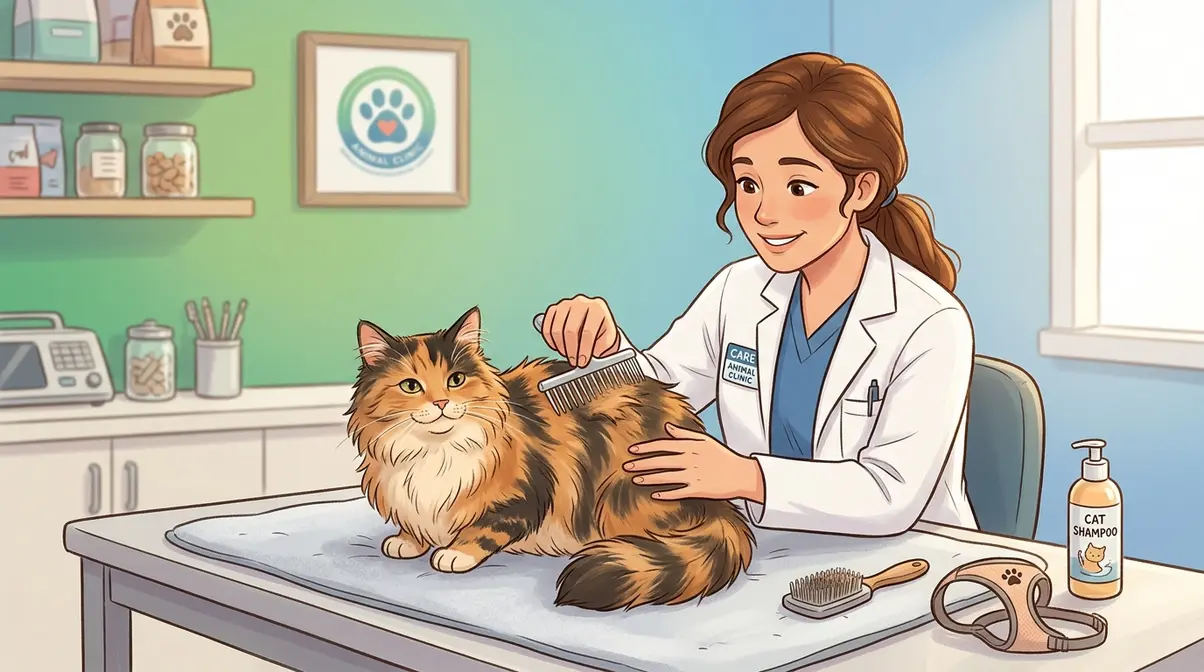
Some mats should never be tackled at home — and recognizing that limit is just as important as knowing the technique. Veterinary sources and professional groomers are consistent on this point: attempting to remove a mat that is beyond your skill level causes more harm than leaving it in place while you arrange professional help.
Common Situations That Require Professional Help
Stop home removal and contact a professional groomer or veterinarian if:
- The mat is hard and pelted flat against the skin. You cannot slide a finger underneath it. This type of mat requires professional clippers and often sedation.
- The skin under or around the mat is red, raw, oozing, or has an odor. This indicates a hot spot or skin infection — a veterinary issue, not a grooming issue. The Ohio State University Veterinary Medical Center confirms that infected skin under mats requires medical treatment before any grooming attempt.
- Multiple mats have merged across a large area of the body (back, belly, or flanks). This is called pelting. It requires full-body clipping under sedation — a procedure performed by a veterinarian or certified groomer.
- Your cat becomes aggressive, bites, or is clearly in pain when the mat area is touched. Pain-related aggression signals that the mat has been present long enough to cause skin damage beneath it.
- Your cat is elderly, very young (under 6 months), has a known health condition, or is on any medication that affects clotting or healing.
When Sedation Is the Right Choice
Fear Free Pets, a veterinary-founded organization focused on reducing animal anxiety during medical and grooming procedures, confirms that sedation-assisted grooming is a safe, humane, and often the most compassionate option for cats with severe matting or extreme handling sensitivity. This is not a last resort — it is simply the right tool for certain situations.
⚠️ Veterinary Disclaimer: This article is intended as general guidance for minor mat removal at home. It is not a substitute for professional veterinary or grooming advice. If your cat is in distress, if the skin beneath a mat appears damaged, or if you have any doubt about the severity of the matting, consult a licensed veterinarian or certified professional groomer before proceeding. The ASPCA’s Animal Poison Control Center and your local veterinarian are always the appropriate first contacts when your cat’s health or safety is uncertain.
Troubleshooting: Common Mistakes and How to Fix Them
Even careful owners run into problems. Here are the most common mistakes — and how to correct them mid-session.
Mistake 1: The comb keeps snagging and pulling.
Fix: You’re applying too much pressure and starting too close to the skin. Move your starting point to the outer tip of the mat and use lighter, shorter strokes. Apply more cornstarch and wait 2 minutes before trying again.
Mistake 2: The cat is getting increasingly agitated.
Fix: You’ve gone past your cat’s tolerance threshold. Stop immediately. Give a treat, end the session, and return in 30–60 minutes. Shorter sessions with more frequent breaks always outperform one long, stressful attempt.
Mistake 3: The mat seems to be getting tighter, not looser.
Fix: You may be combing in the wrong direction — away from the tip and toward the skin. Reverse your stroke direction. Also check whether the mat is wet; water tightens mats significantly. If the fur is damp, dry it completely with a towel before continuing.
Mistake 4: The mat separated but now there are several smaller knots.
Fix: This is normal and actually progress. Treat each smaller knot as its own mat — apply The Base-Hold Method and work each one individually. They will be much easier to resolve than the original mat.
Mistake 5: The skin looks pink or slightly red after mat removal.
Fix: Mild redness is common after mat removal, especially if the mat was tight. Clean the area gently with a damp cloth and monitor for 24–48 hours. If redness deepens, swelling appears, or your cat begins licking the area obsessively, contact your veterinarian — this may indicate a developing hot spot.
Frequently Asked Questions
How do you remove severely matted cat fur?
Severely matted cat fur — mats that are hard, pelted flat against the skin, or covering a large area — should not be removed at home. This type of matting requires professional clipping, often with sedation, performed by a certified groomer or veterinarian. At home, “severe” means you cannot slide a finger between the mat and the skin. Attempting to cut or force-comb a severe mat risks serious skin lacerations, as cat skin folds invisibly into dense mats (Cornell University Feline Health Center). The Merck Veterinary Manual confirms that pelted matting is a professional-only procedure. If the skin beneath looks red or raw, see a vet before any grooming attempt — this may indicate a hot spot requiring medical treatment. The same applies to the variation of this question: there is no safe home method for removing severely matted hair on a cat when the mat is dense and skin-level.
Will matted cat fur grow out on its own?
No — matted fur does not grow out or resolve on its own. Unlike human hair tangles, cat mats tighten over time as the cat moves, grooms, and the fur continues to grow into the tangle. The mat becomes progressively denser, pulls more tightly against the skin, and causes increasing discomfort. Cat owners who wait and hope the mat will loosen typically find the opposite: what started as a soft, manageable tangle becomes a hard, skin-level pelted mat within weeks. Prompt, gentle intervention — or professional grooming — is always the better path.
Is a matted cat a sign of neglect?
Matting alone is not automatically a sign of neglect — it can develop even in well-cared-for cats. Long-haired breeds like Maine Coons, Persians, and Ragdolls are highly prone to matting even with regular brushing. Senior cats, overweight cats, and cats with arthritis often cannot self-groom effectively, making mats nearly inevitable without human help. However, severe full-body matting — where large areas are pelted and the skin shows signs of infection — can indicate that grooming has been neglected for an extended period. If you’ve recently adopted a cat with serious matting, a veterinary visit is the right first step to assess the skin’s health before any grooming begins.
Can I use human detangler spray on my cat?
No — human detangler sprays and conditioners should never be used on cats. Cats groom themselves constantly, meaning they will ingest whatever product you apply to their fur. Human products contain fragrances, silicones, and preservatives that can cause gastrointestinal upset or toxicity in felines. Always stick to cat-safe, non-toxic options like plain cornstarch or products specifically formulated for feline grooming.
How often should I check my cat for mats?
You should check your cat for mats at least once a week, or daily for long-haired breeds. Run your fingers down to the skin, paying special attention to high-friction areas like behind the ears, under the armpits, and around the base of the tail. Catching a tangle early before it tightens into a mat makes removal significantly easier and prevents skin irritation.
Keeping Your Cat Mat-Free Going Forward
Removing a mat is a one-time fix. The Base-Hold Method gives you the safety foundation to handle minor mats at home — but the goal is to reach a point where you rarely need it. Understanding how to remove mats from cat fur is a valuable skill, but preventing them is even better.
Cat owners who establish a consistent brushing routine report that mats become increasingly rare within 4–6 weeks. The investment is small: 5 minutes of brushing, 2–3 times a week for medium-haired cats, or daily for long-haired breeds. Petco’s grooming guidance and The Spruce Pets’ dematting resources both confirm that regular brushing is the single most effective mat prevention strategy available.
If you’ve worked through the steps in this guide and your cat still has mats that concern you, don’t hesitate to call your veterinarian or a certified professional groomer. Asking for help is not failure — it is the most responsible choice you can make for an animal who depends entirely on you.
For related cat care topics — including how to manage litter box hygiene and eliminate odors — explore the other guides in our cat care library.

Dave King
Hot tub tester and writer at One Hot Tub.