
Table of Contents
- What You’ll Need Before You Start
- Step 1: Choose the Right Litter Box and Litter
- Step 2: Place the Box in the Right Spot
- Step 3: Introduce Your Kitten to the Litter Box
- Step 4: Establish a Consistent Daily Routine
- Step 5: Reward Success and Handle Accidents
- Age-Specific Litter Training Tips
- How Long Does Litter Training Take?
- Training Kittens in Special Situations
- Troubleshooting Litter Box Avoidance
- When to See a Vet
- Frequently Asked Questions
- You’re Ready — Start the 3R Protocol Today
This blog post may contain affiliate links. As an Amazon Associate I earn from qualifying purchases.
You found a wet spot on the carpet this morning, and your new kitten is sitting nearby, looking entirely unbothered. It happens to almost every new kitten owner — and it doesn’t mean you’re doing anything wrong.
Without the right setup from day one, though, accidents can become a habit that’s much harder to break. Cat urine in carpet is notoriously difficult to fully eliminate, and the scent alone can keep drawing your kitten back to the same spot.
“I already have 2 cats, but I rescued them as adults. We plan to move soon and we were going to rescue another cat from the shelter.”
If that sounds like you, you’re in exactly the right place. Kittens are different from adult cats — and this guide covers precisely what that means for litter training.
By the end of this guide, you’ll know how to litter train a kitten using The 3R Protocol — the Right supplies, Right routine, and Right reinforcement — so your kitten is reliably using the box within a week. We cover supplies, step-by-step training, age-specific tips, troubleshooting, and medical red flags — everything a new kitten owner needs in one place.
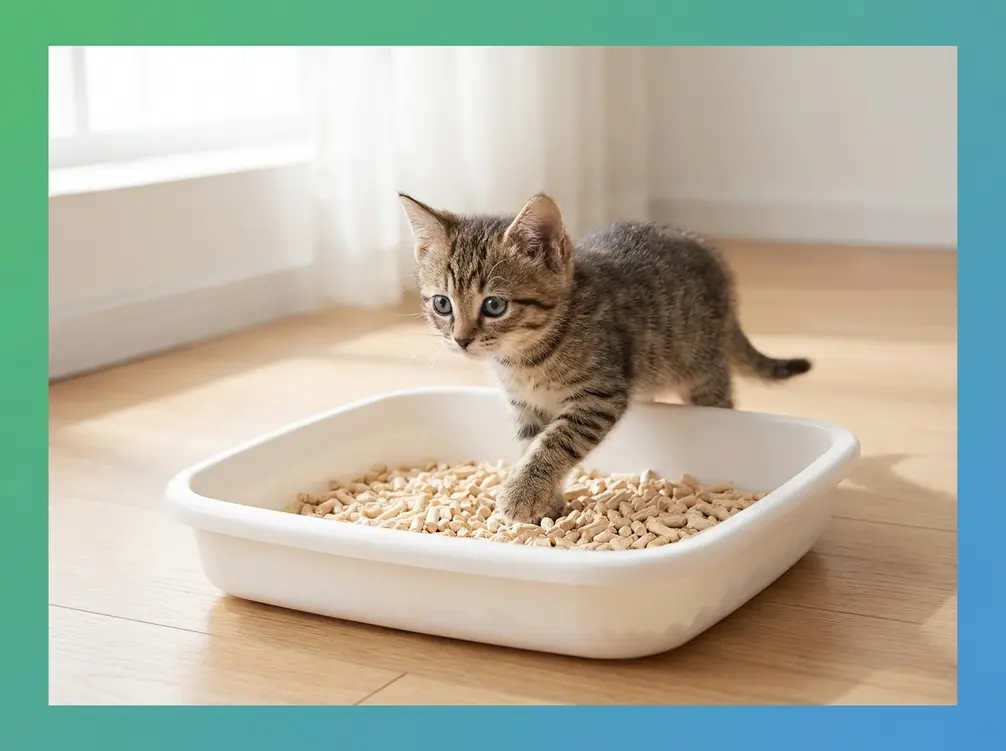
To litter train a kitten, set up a shallow, open-top litter box with non-clumping litter, then introduce your kitten to it within the first hour of arriving home. The process follows 5 steps and takes most kittens just a few days to one week. Kittens are naturally motivated to bury their waste — your job is simply to eliminate obstacles and make the right choice obvious.
Key Takeaways: How to Litter Train a Kitten
Most kittens train themselves within a few days when you follow the 3R Protocol — Right supplies, Right routine, Right reinforcement. Kittens begin using a litter box naturally as early as 3–4 weeks old (Animal Humane Society).
- Right Supplies: Use a shallow, open-top box with non-clumping litter for kittens under 4 months
- Right Routine: Place your kitten in the box after every meal, nap, and play session
- Right Reinforcement: Praise immediately after success — never punish accidents
- Red Flag: Straining, crying, or blood in urine = call your vet same day, not next week
What You’ll Need Before You Start
Before placing a litter box anywhere in your home, gather these four items. Using the wrong supplies is the #1 reason kittens fail to train — not stubbornness, not instinct problems. This is the first R of The 3R Protocol: getting the Right supplies in place before training begins.
Essential Supplies Checklist
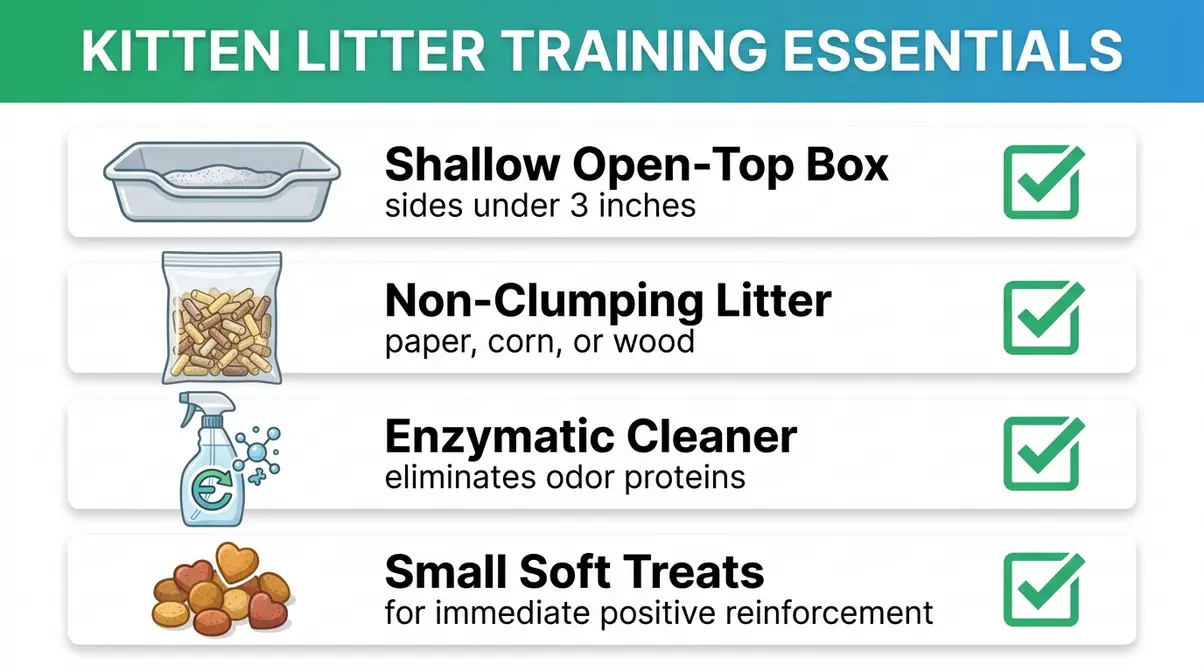
Here’s what to gather before Step 1:
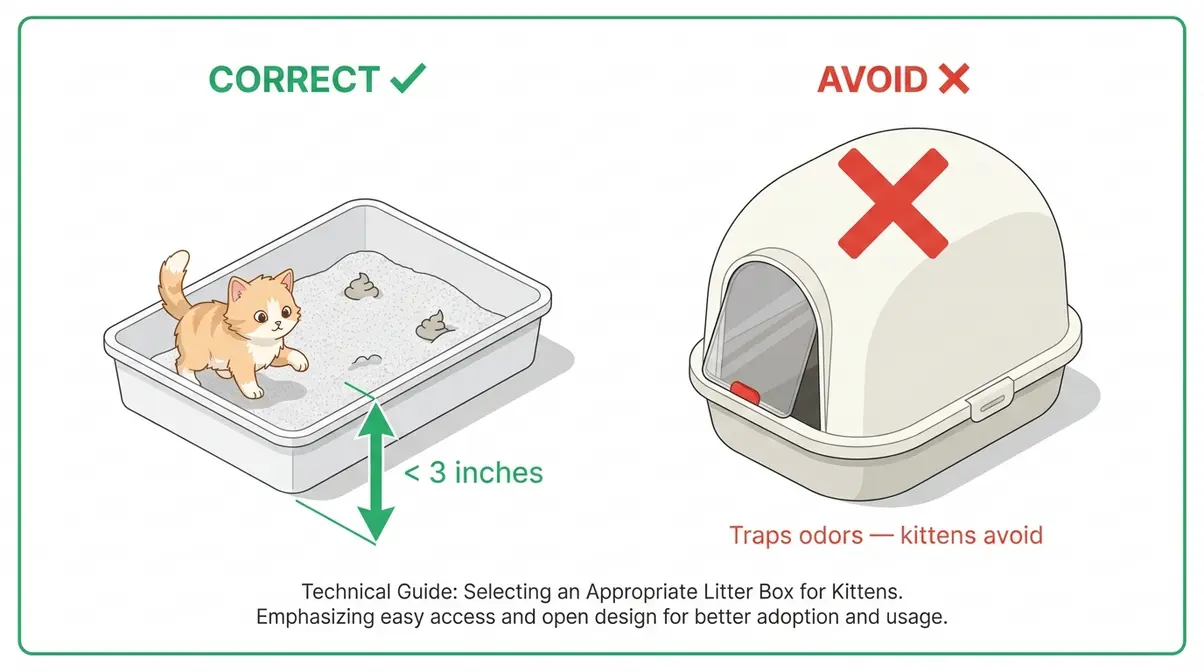
- Litter box: A shallow, open-top plastic tray with sides under 3 inches high — low enough that your kitten can step in without jumping or climbing. Avoid covered boxes initially. They trap odors that overwhelm young kittens and may cause them to avoid the box entirely.
- Litter: Non-clumping, fragrance-free litter made from paper, corn, or wood pellets. Kittens under 4 months old should never use clumping clay litter — accidental ingestion can cause severe intestinal blockages (Best Friends Animal Society).
- Enzymatic cleaner: An enzymatic cleaner is a cleaning product that breaks down odor-causing proteins at the molecular level. Regular soap leaves invisible residue that attracts your kitten back to the same accident spot. Enzymatic cleaners eliminate that signal completely.
- Small treats or praise: Soft, kitten-safe treats for positive reinforcement (rewarding good behavior immediately after it happens). A simple enthusiastic “good kitty!” works just as well as food rewards for many kittens.
How Much Time Will This Take?
Most kittens adapt within 3 to 7 days when the setup is correct. Younger kittens (under 8 weeks) may take slightly longer. Older kittens adopted at 12 weeks or more often figure it out within 24–48 hours. The 3R Protocol is designed to work with your kitten’s natural instincts — not against them — so the process rarely requires weeks of effort.
With these four items ready, you’re set to follow the five core steps. Start with the most important: the box itself.
Step 1: Choose the Right Litter Box and Litter
The right box and litter aren’t just conveniences — they determine whether your kitten will use them at all. Veterinary consensus indicates that litter box avoidance is one of the most common behavioral complaints in cats, and the wrong setup is a leading cause (VCA Hospitals).
Picking the Right Box Size and Style
Choose a box based on these criteria:
- Sides: Under 3 inches high. Your kitten should step in, not climb in.
- Length: At least 1.5 times the length of your kitten from nose to tail base.
- Style: Open-top only. No lids, flaps, or doors until your kitten is reliably trained and at least 6 months old.
- Material: Smooth plastic — easy to clean and odor-resistant.
Avoid self-cleaning or automatic litter boxes for kittens. The motor noise can startle them and create a fear association with the box.
Choosing Safe Litter for Kittens
Not all litters are kitten-safe. The key distinction is clumping versus non-clumping:
| Litter Type | Safe for Kittens Under 4 Months? | Notes |
|---|---|---|
| Non-clumping paper pellets | ✅ Yes | Safest option — soft, digestible if ingested |
| Non-clumping wood or corn | ✅ Yes | Natural, low-dust, fragrance-free |
| Clumping clay | ❌ No | Ingestion risk — can cause intestinal blockage |
| Scented litter (any type) | ❌ Avoid | Strong fragrance repels kittens |
| Crystal/silica gel | ⚠️ Caution | Not recommended under 4 months |
Fill the box with about 2 inches of litter — enough to scratch and bury, but not so deep it becomes difficult to navigate. Once your kitten is 4–5 months old and no longer mouthing everything, you can transition to clumping litter if preferred. For more foundational advice, review our guide on essential litter box setup and training tips.
Step 2: Place the Box in the Right Spot
Even a perfect litter box fails if it’s in the wrong location. Placement is the second pillar of The 3R Protocol: Right routine starts with a box your kitten can find every time.
The 5 Rules of Litter Box Placement

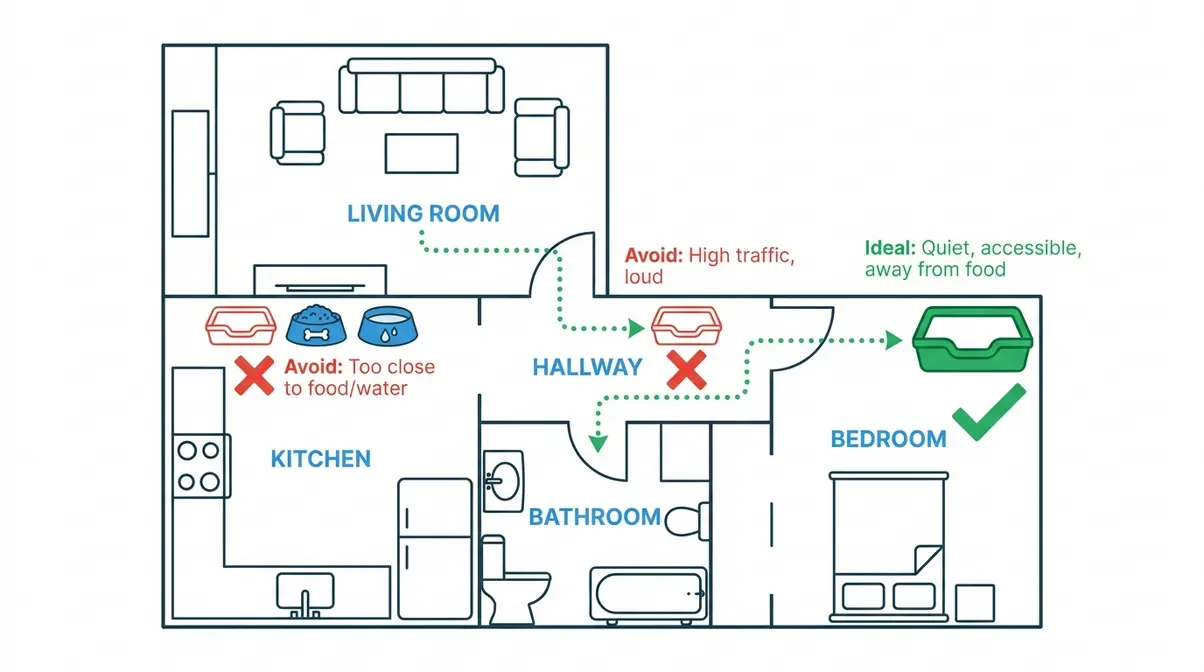
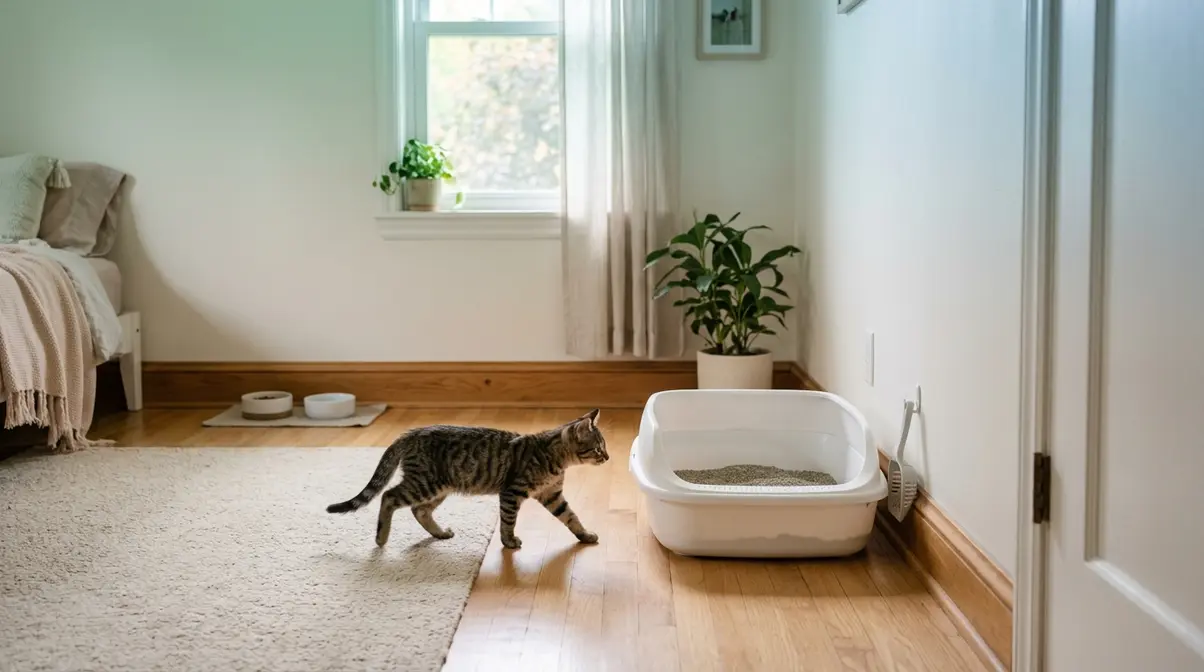
Follow these five rules when choosing a spot:
- Quiet and low-traffic. Avoid laundry rooms with loud machines, hallways, or near the front door. A startled kitten won’t return to a box that scared them.
- Away from food and water. Cats instinctively avoid eliminating near their food source. Keep the box at least 6 feet from food bowls.
- Easy to access at all times. Never place the box behind a closed door or inside a cabinet. Your kitten needs to reach it in seconds when the urge strikes.
- On the same floor your kitten uses most. A box on the basement level won’t help a kitten confidently exploring the living room. Start with the box wherever your kitten spends the most time.
- Not in a corner with only one exit. Multi-cat households can lead to “ambush” situations. Give your kitten an escape route.
How Many Litter Boxes Are Needed?
The ASPCA recommends the “N+1 rule”: one litter box per cat, plus one extra. For a single kitten, that means two boxes. This sounds excessive, but it eliminates competition (in multi-cat homes) and gives your kitten a backup if one box is dirty.
For a kitten under 12 weeks confined to a single room during training, one box placed in that room is sufficient. Expand to two boxes once your kitten starts roaming more freely.
Step 3: Introduce Your Kitten to the Litter Box
Introducing the box correctly is the difference between a kitten who uses it immediately and one who treats it as a nap spot. Kittens begin self-eliminating as early as 3–4 weeks old when prompted by their mother (Animal Humane Society) — your introduction simply transfers that instinct to the right location.
Scratch-and-Sniff Introduction Method
Follow these steps the first time you introduce the box:
- Place your kitten directly into the box within the first hour of arriving home. Don’t wait for an accident to happen first.
- Let them sniff. Allow 30–60 seconds of exploration. Your kitten will likely start sniffing the ground and pawing at the litter.
- Gently take one front paw and make a gentle scratching motion in the litter — two or three times. This triggers the digging instinct.
- Step back immediately. Don’t hover. Give your kitten space to do what instinct tells them.
- If they use the box, praise immediately. Soft voice, a small treat, or gentle petting — within 3 seconds of the behavior.
If your kitten jumps out without eliminating, that’s fine. Simply repeat the process at the next opportunity (after meals, after naps, after play).
When to Place Your Kitten in the Box
Kittens typically need to eliminate within 5–15 minutes after eating, waking up, or playing intensely. Watch for these behavioral cues that signal it’s time:
- Sniffing the ground and moving in a purposeful pattern
- Pacing in small circles
- Crouching low and looking for a corner or secluded spot
- Sudden stillness after active play
When you spot any of these signals, pick up your kitten calmly and place them in the box. Avoid rushing or startling them — a calm placement leads to a calm elimination. Consistency at these four moments builds the routine faster than anything else.
Step 4: Establish a Consistent Daily Routine
Routine is the engine of litter training. Kittens thrive on predictability, and a consistent schedule eliminates the guesswork for both of you. This is the heart of The 3R Protocol: Right routine, repeated daily.
The 4 Key Moments to Use Every Day
Place your kitten in the litter box at these four moments, every day:
- After waking up (morning and after every nap) — bladder pressure is highest immediately after sleep.
- After every meal — digestion triggers the urge to eliminate within 15–20 minutes of eating.
- After active play sessions — physical activity stimulates the digestive system.
- Before bed — reduces the chance of overnight accidents.
For kittens under 10 weeks, you may need to add a midday check-in as well. Their bladder control is still developing, and they may need the box every 2–3 hours. As they grow, their control improves and the schedule naturally simplifies.
Why Small Spaces Speed Up Training
One of the most effective — and underused — techniques is temporary confinement. After evaluating guidance from humane societies and veterinary behaviorists, we at madcatman.com consistently find that kittens trained in a single room first learn faster than those given free roam immediately.
Here’s why: a kitten confidently exploring a large home can’t always find the box in time. When confined to one room with the box clearly visible, they have no other option. The habit forms quickly because the box is always within reach.
- How to apply confinement training:
- Start with one room (a bathroom or small bedroom works well).
- Place the litter box, food, water, and a bed in that room.
- Keep your kitten there for the first 3–5 days, or until they’re using the box reliably.
- Gradually expand access to one new room at a time, adding a second litter box as you go.
This approach works especially well for kittens who are still weaning from their mother or who were recently separated from their litter.
Step 5: Reward Success and Handle Accidents
The final R in The 3R Protocol is Right reinforcement — and it’s the most misunderstood step. Most accidents happen because of reinforcement errors, not because the kitten is stubborn or confused.
Rewarding Without Overdoing It
Positive reinforcement works only when it’s immediate. Here’s how to do it correctly:
- Reward within 3 seconds of your kitten finishing in the box. After that window closes, the kitten cannot connect the reward to the behavior.
- Use a consistent reward signal. A specific word (“yes!” or “good!”) paired with a treat creates a conditioned response over time.
- Keep treats tiny — a treat the size of a pea is enough. You’re reinforcing, not feeding.
- Never force your kitten back into the box after an accident. This creates a fear association, not a learning moment.
- Avoid excessive celebration. A calm, warm “good kitty” is more effective than excited screaming, which can startle a kitten mid-elimination and interrupt the behavior.
Across cat owner communities, the most reported reinforcement mistake is punishing accidents — rubbing a kitten’s nose in waste, raising your voice, or placing them in the box immediately after an accident. None of these work, and all of them damage trust.
Cleaning Accidents the Right Way
How you clean an accident is as important as anything else in this guide. Cat urine contains compounds that persist after the smell fades to human noses — your kitten can still detect them and will return to the same spot.
- For carpet accidents:
- Blot (don’t rub) the area with paper towels to absorb as much liquid as possible.
- Apply enzymatic cleaner generously — enough to saturate the same depth the urine reached.
- Let it sit for 10–15 minutes before blotting dry.
- Allow to air dry completely. Do not steam clean — heat sets the odor permanently.
- For hard floors:
- Wipe up liquid with paper towels.
- Apply enzymatic cleaner and let sit for 5–10 minutes.
- Wipe clean and allow to air dry.
Never use ammonia-based cleaners. Ammonia smells like urine to a cat and actively encourages re-marking. Standard household cleaners (bleach, Windex, dish soap) may remove the visible stain but leave odor proteins intact.
Age-Specific Litter Training Tips
Kitten litter training isn’t one-size-fits-all. The approach that works for an 8-week-old is different from what a 3-week-old neonate needs. Understanding age-specific differences helps you set realistic expectations and apply the right technique from day one.
When to Start Litter Training?
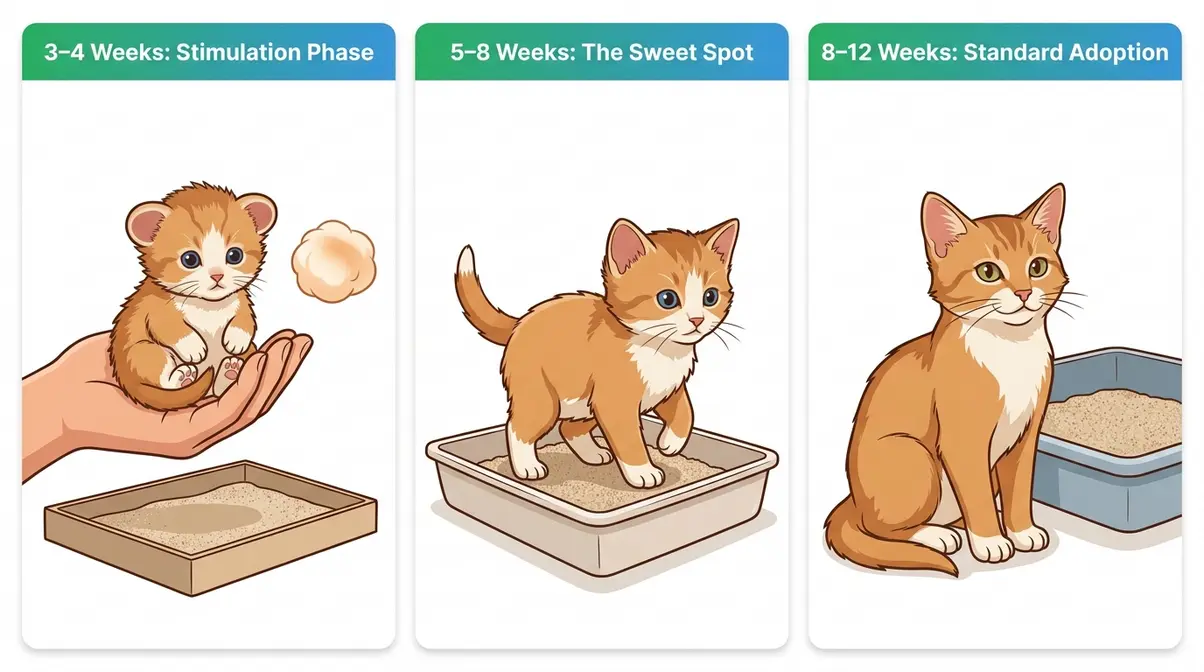
Kitten litter training can begin as early as 3–4 weeks old, though kittens this young still need manual stimulation to eliminate and require a very shallow container rather than a standard box. The optimal window is 5–8 weeks, when kittens have developing motor control and natural instincts to scratch and bury. Standard shelter adoptions happen at 8–12 weeks — kittens this age often adapt within 24–48 hours when given the right setup (Animal Humane Society).
3 to 4 Weeks Old: Earliest Starters
Kittens this young are still in the weaning phase — transitioning from mother’s milk to solid food. They cannot fully control their elimination yet, and normally their mother would stimulate them by licking their abdomen.
- If you’re caring for a 3–4 week old kitten without a mother:
- After each feeding, use a warm, damp cotton ball or soft cloth to gently stimulate the lower abdomen and genital area in small circular motions. This mimics what the mother would do.
- Once the kitten begins to eliminate, immediately place them in a very shallow box (a box lid or baking pan works) with just a thin layer of non-clumping litter.
- At this age, “training” is mostly stimulation and placement — the instinct to scratch and bury develops over the next few weeks.
5 to 8 Weeks Old: The Sweet Spot
This is the optimal window for kitten litter training. By 5 weeks, most kittens are beginning to eliminate independently, and by 6–8 weeks, they have enough motor control and instinct to use a box reliably when given the right setup.
Kittens in this range respond best to the full 3R Protocol. Apply the scratch-and-sniff introduction method, follow the four daily timing cues, and use confinement training. Most kittens in this age group are using the box consistently within 3–5 days.
8 Weeks and Older: Standard Adoptions
Most shelter and breeder kittens are adopted at 8–12 weeks. At this age, kittens have full motor control, developed instincts, and enough cognitive development to learn quickly. Many kittens adopted at this age begin using the litter box within 24–48 hours of arriving home — especially if they were already exposed to one at the shelter or with their mother.
For kittens 8 weeks and older, the biggest barrier is usually environmental — wrong box size, wrong litter type, or poor placement — rather than developmental readiness. If a kitten this age isn’t using the box by day 3, revisit Steps 1 and 2 before assuming a behavioral problem.
How Long Does Litter Training Take?
Most first-time kitten owners expect weeks of effort. The reality is far more encouraging — and understanding the typical timeline helps you avoid unnecessary anxiety when normal variation occurs.
Fastest Way to Train a Kitten?
The fastest way to litter train a kitten is confinement training combined with consistent timing. Confine your kitten to one room with the litter box clearly visible, then place them in it after every meal, nap, and play session. Most kittens trained this way begin using the box reliably within 2–3 days. The key insight: speed comes from eliminating the kitten’s ability to find an alternative spot, not from increasing correction.
The Typical Timeline: Days, Not Weeks
| Kitten Age at Adoption | Typical Training Timeline |
|---|---|
| 3–4 weeks (orphaned) | 2–4 weeks with stimulation assistance |
| 5–8 weeks | 3–7 days with consistent routine |
| 8–12 weeks (standard adoption) | 1–3 days to 1 week |
| 12+ weeks | 24–48 hours in most cases |
After evaluating guidance from veterinary behaviorists and humane society resources, the consistent finding at madcatman.com is this: kittens who struggle past 2 weeks almost always have a setup problem, not a behavioral one. Check the box, the litter type, and the placement before assuming training failure.
Factors That Affect Training Speed
Several variables affect how quickly kitten litter training clicks:
- Speeds training up:
- Confinement to one room initially
- Consistent timing (placing in box after meals, naps, and play)
- Clean box — scooped at least once daily
- Stable, low-stress environment
- Slows training down:
- Large home with free roam before habits are established
- Covered or high-sided litter box
- Scented litter (repels kittens)
- Previous outdoor access or feral background
- Household stress (loud noises, new pets, moving)
The 3-3-3 Rule for Expectations
The 3-3-3 Rule is a behavioral framework used by rescue organizations to describe how rescue animals adjust to a new home:
- 3 days: Overwhelmed and shut down — your kitten may hide, not eat much, and seem confused. Accidents are normal here.
- 3 weeks: Beginning to relax — your kitten starts confidently exploring, establishes routines, and shows their real personality.
- 3 months: Fully settled — your kitten feels safe, their habits are established, and litter box use is automatic.
This framework matters for litter training because it reframes early accidents as adjustment behavior, not training failure. A kitten who has accidents in the first 3 days is not a problem kitten — they’re a scared kitten. Keep the routine consistent and patient. The instinct is there; the comfort takes a few days to arrive.
Training Kittens in Special Situations
Not every kitten arrives as a healthy 8-week-old from a responsible breeder. Special circumstances require adapted approaches.
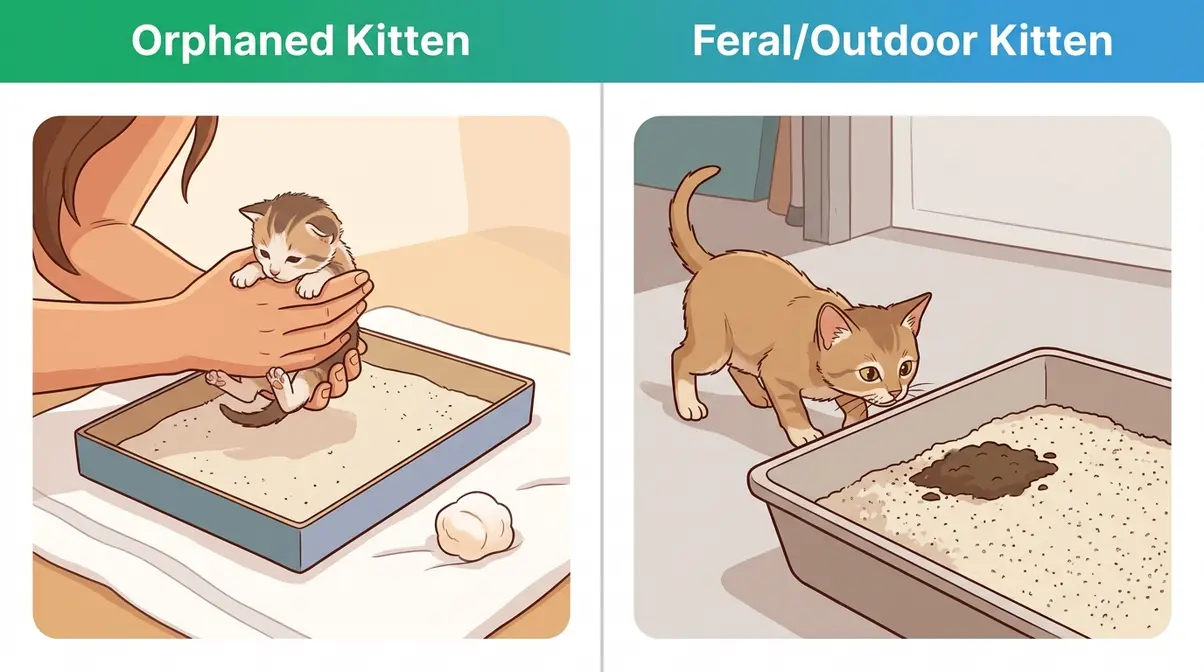
Orphaned Kittens Without a Mother
Orphaned kittens under 4 weeks need manual stimulation to eliminate (see the 3–4 week section above). Once they reach 4–5 weeks and begin eating solid food, transition to the full 3R Protocol.
The key challenge with orphaned kittens is that they missed early behavioral modeling from their mother. They haven’t seen another cat use a litter box. Be patient with the scratch-and-sniff introduction — you may need to repeat it more times than with a mother-raised kitten. Kitten Lady provides detailed neonatal care guidance for orphaned kittens at every developmental stage.
Stray, Feral, and Outdoor Kittens
Kittens with outdoor experience often prefer soil-like textures. When introducing an outdoor kitten to a litter box, try mixing a small amount of outdoor dirt into the litter for the first week. This creates a familiar scent and texture bridge. Gradually reduce the dirt ratio each day until the kitten is using plain litter.
Feral-background kittens may also be more reactive to handling. Avoid forcing them into the box. Instead, observe their pacing and crouching cues, then calmly guide them toward the box without picking them up if possible. Patience and low-pressure exposure work better than correction with these kittens.
Advanced Patience Techniques
Some kittens — particularly confident, independent personalities — resist the box for reasons that have nothing to do with instinct or setup. Before labeling a kitten “stubborn,” run through this checklist:
- Is the box clean? Scoop at least once daily — many cats refuse a box used more than once.
- Is the litter depth correct? Too deep (over 3 inches) can feel unstable underfoot.
- Is the box in a high-traffic area? Move it somewhere quieter.
- Have you tried a different litter texture? Some kittens prefer finer litter; others prefer pellets.
- Are there other pets in the home watching the kitten use the box? Provide privacy.
If none of these solve the problem within a week, consult your vet to rule out a medical cause before trying further behavioral interventions.
Troubleshooting Litter Box Avoidance
Accidents happen. Most have a straightforward fix once you identify the cause. Here’s how to potty train a kitten through the most common setbacks.
7 Common Litter Training Mistakes
| Mistake | What Goes Wrong | The Fix |
|---|---|---|
| 1. Box too deep or high-sided | Kitten avoids stepping in | Switch to a box with sides under 3 inches |
| 2. Covered box | Odor buildup repels kitten | Remove the cover immediately |
| 3. Clumping litter under 4 months | Ingestion risk + texture aversion | Switch to non-clumping paper or corn litter |
| 4. Box near food/water | Natural avoidance instinct | Move box at least 6 feet away |
| 5. Infrequent scooping | Kitten refuses dirty box | Scoop once daily minimum; full change weekly |
| 6. Punishing accidents | Fear association with box | Stop all punishment; use only positive reinforcement |
| 7. Too much free roam too soon | Can’t find box in time | Confine to one room; expand gradually |
Cleaning Carpet and Hard Floors
Repeat accidents in the same spot almost always mean the enzymatic cleaner wasn’t applied correctly — or a non-enzymatic cleaner was used. Here’s the full process:
- Carpet:
- Blot immediately with paper towels — press firmly, don’t rub.
- Apply enzymatic cleaner until the area is visibly saturated.
- Cover with a damp towel and let sit for 10–15 minutes.
- Blot dry and allow to air-dry fully (12–24 hours).
- Once dry, place a piece of aluminum foil over the spot for 48 hours — most kittens dislike the texture and sound, which deters re-marking.
Hard floors: Follow the same steps but reduce sitting time to 5 minutes. Avoid mopping with ammonia-based products — ammonia mimics the smell of urine and actively encourages your kitten to mark the same spot again.
Medical vs. Behavioral Issues
Knowing the difference between a kitten still learning and a kitten with a health problem could save their life. Cornell Feline Health Center research indicates that approximately 10% of cats develop elimination problems linked to medical causes — and in kittens, those causes can escalate quickly.
- Normal behavioral learning curve:
- Occasional accidents in the first 1–2 weeks
- Missing the box by a few inches
- Using the box inconsistently but improving daily
- Medical red flags — contact your vet same day:
- Straining in the box with little or no output
- Crying or vocalizing while attempting to eliminate
- Blood in urine or stool
- Urinating in small amounts very frequently
- Complete avoidance of the box after previously using it reliably
- Lethargy combined with any of the above
If your kitten shows any red flag symptoms, stop troubleshooting the litter box and call your vet. These symptoms can indicate a urinary tract infection (UTI), blockage, or intestinal parasites — all of which require prompt medical treatment. If you have older cats in the home experiencing similar issues, review our comprehensive resource on troubleshooting common litter box issues.
When to See a Vet
Most litter training challenges resolve within a week. When they don’t, or when specific symptoms appear, veterinary attention is not optional — it’s urgent.
Symptoms That Need Same-Day Attention
Contact your vet the same day — not next week — if your kitten shows any of the following:
- Straining to urinate or defecate with little or no output (possible blockage)
- Crying or vocalizing while in the litter box
- Blood in urine or stool (visible pink, red, or brown discoloration)
- Urinating outside the box suddenly after weeks of reliable use (possible UTI or stress-related cystitis)
- Diarrhea lasting more than 24 hours in a kitten under 12 weeks (dehydration risk is high)
- Bloated abdomen combined with straining
UC Davis Veterinary Medicine notes that urinary blockages in young cats can become life-threatening within 24–48 hours. Early symptoms are easy to confuse with behavioral accidents. When in doubt, call.
What to Tell Your Vet
When you call, have this information ready:
- Age and weight of your kitten (approximate is fine)
- When the symptom started — hours or days
- What the litter box output looks like — color, consistency, amount
- Any recent changes — new litter brand, new food, new pet in the home, move or construction noise
- Whether the kitten is eating and drinking normally
This information helps your vet triage the call accurately and advise whether you need an emergency visit or a next-day appointment. Persistent litter box issues that don’t respond to the 3R Protocol within 10–14 days also warrant a vet consultation to rule out underlying causes.
Frequently Asked Questions
Common Litter Training Mistakes?
The most common litter training mistakes are using a covered box, clumping litter for young kittens, and punishing accidents. Covered boxes trap odors that repel kittens. Clumping clay litter poses an ingestion risk for kittens under 4 months. Punishment creates fear around the box rather than a positive association. A 2026 review of cat owner forums highlighted by Chewy shows these three mistakes account for the majority of reported training failures. Fix the setup before assuming a behavioral problem.
Stopping Accidents in the House
To stop repeat accidents, clean every spot thoroughly with an enzymatic cleaner and reassess your litter box setup. Regular soap leaves odor proteins that attract your kitten back. Apply enzymatic cleaner until the area is fully saturated, let it sit 10–15 minutes, then blot dry. Simultaneously, check that the box is in a quiet location, has low sides, uses non-clumping litter, and is scooped daily. If accidents continue past 2 weeks despite correct setup, consult your vet to rule out a UTI or other medical cause.
Best Litter Box and Litter Type?
Use a shallow, open-top plastic box with sides under 3 inches, filled with 2 inches of non-clumping, fragrance-free litter. Paper pellets, corn-based litter, or wood pellets are all safe choices. Never use clumping clay litter for kittens under 4 months, as accidental ingestion can cause intestinal blockages (Best Friends Animal Society).
You’re Ready — Start the 3R Protocol Today
For new kitten owners, litter training feels daunting until you understand what’s actually happening: your kitten already wants to use a litter box. The instinct to scratch, bury, and eliminate in a designated spot is hardwired. The 3R Protocol — Right supplies, Right routine, Right reinforcement — simply removes the obstacles between that instinct and the correct behavior. Most kittens are reliably trained within a week when these three conditions are met.
The framework works because it matches how kittens actually learn. Confinement reduces confusion. Timing cues connect the routine to natural biological urges. Immediate positive reinforcement builds the association fast. And an enzymatic cleaner ensures past accidents don’t pull your kitten back to the wrong spot.
Start today: set up the shallow box with non-clumping litter, place it in a quiet room your kitten uses most, and do the scratch-and-sniff introduction within the first hour. Follow the four daily timing cues for the first week. At madcatman.com, we’ve seen this approach work consistently — even for kittens with feral backgrounds, late adoptions, and anxious personalities. If anything feels off after 10–14 days, your vet is your next call — not another troubleshooting article.